JVC HR-S5900U Instructions - Page 46
Editing
 |
UPC - 046838158841
View all JVC HR-S5900U manuals
Add to My Manuals
Save this manual to your list of manuals |
Page 46 highlights
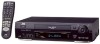
46 EN Edit From Camcorder Connection This VCR (for recording) (HR-S5900U/5910U) POWER S VIDEO VIDEO (MONO)L-AUDIO-R REC LINK S-VHS ET A.DUB INSERT PLAY REW - FF + CH- /+ PUSH / TURN 24HR QUICK PROGRAM REC PAUSE STOP/EJECT To AUDIO/ VIDEO Input Audio/video cable (not supplied) To rear panel REMOTE PAUSE/ AV COMPULINK connector To S VIDEO Input* S-video cable (supplied) Mini-plug cable (not supplied) (JVC camcorder only) To Audio/video output To EDIT To S-video output Camcorder (for playback) * For HR-S3900U/3910U, the S VIDEO input connector is located on the rear panel. POWER S VIDEO VIDEO (MONO)L-AUDIO-R REC LINK S-VHS ET EDITING 3 A.DUB INSERT PLAY REW - FF + CH- /+ PUSH / TURN 24HR QUICK PROGRAM REC PAUSE STOP/EJECT 8 1 2 3 2 4 5 6 3 7 8 9 0 4 3 1 8 4 5 6 3 4 5 4 5 Various connection for editing tapes The following three methods can be used for editing tapes. ● VHS to S-VHS editing (VIDEO-VIDEO connection): Although the picture quality is inherently limited by the original VHS quality, the edited tape has better picture quality than those made by VHS-to-VHS editing. ● S-VHS to VHS editing (VIDEO-VIDEO connection): Since the original source is recorded in S-VHS mode, the edited tape has better picture quality than those made by VHS-to-VHS editing. ● S-VHS to S-VHS (S-VIDEO connection): Original picture quality of S-VHS made can be duplicated with minimal picture degradation. This is the best editing method you can use on S-VHS VCRs.
-
 1
1 -
2
-
3
-
4
-
5
-
6
-
7
-
8
-
9
-
10
-
11
-
12
-
13
-
14
-
15
-
16
-
17
-
18
-
19
-
20
-
21
-
22
-
23
-
24
-
25
-
26
-
27
-
28
-
29
-
30
-
31
-
32
-
33
-
34
-
35
-
36
-
37
-
38
-
39
-
40
-
 41
41 -
 42
42 -
 43
43 -
 44
44 -
 45
45 -
 46
46 -
 47
47 -
 48
48 -
 49
49 -
 50
50 -
 51
51 -
52
-
53
-
54
-
55
-
56
-
57
-
58
-
59
-
60
-
61
-
62
-
63
-
64
-
65
-
66
-
67
-
68
 |
 |
