JVC KD-R960BTS Instruction Manual - Page 24
Display Settings - wiring
 |
View all JVC KD-R960BTS manuals
Add to My Manuals
Save this manual to your list of manuals |
Page 24 highlights
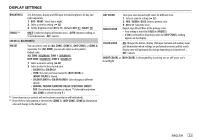
AUDIO SETTINGS SPK/PRE OUT Connection via lineout terminals ( 31, 32) (For KD-R960BTS / KD-R860BT) Setting FRONT Lineout terminal REAR/SW REAR/REAR Front speakers output Rear speakers output REAR/SUB.W Front speakers output Subwoofer output SUB.W/SUB.W Front speakers output Subwoofer output (For KD-AR865BTS) Setting Lineout terminal FRONT REAR SW REAR/REAR Front speakers output Rear speakers output Subwoofer output REAR/SUB.W - - - SUB.W/SUB.W Front speakers output L (left): Subwoofer output Subwoofer output R (right): (Mute) Connection via speaker leads ( 31, 32) Setting L (left) Rear speaker lead R (right) REAR/REAR Rear speakers output Rear speakers output REAR/SUB.W Rear speakers output Rear speakers output SUB.W/SUB.W Subwoofer output (Mute) If [SUB.W/SUB.W] is selected: - [HIGH 120HZ] is selected in [SUB.W LPF] and [THROUGH] is not available. - [R01] is selected in [FADER] and selectable range is [R06] to [00] DISPLAY SETTINGS KD-R960BTS KD-AR865BTS / KD-R860BT 1 Press and hold . 2 Turn the volume knob to make a selection (see the following table), then press the knob. 3 Repeat step 2 until the desired item is selected/activated or follow the instructions stated on the selected item. 4 Press to exit. To return to the previous setting item, press . Default: XX DISPLAY DIMMER Selects the display and button illumination adjusted in the [BRIGHTNESS] setting. OFF: Selects the day adjustments. ; ON: Selects the night adjustments. ; DIMMER TIME: Adjusts the dimmer on and off time. Turn the volume knob to adjust the [ON] time, then press the knob. Turn the volume knob to adjust the [OFF] time, then press the knob. (Default: [ON]: 18:00 or 6:00 PM [OFF]: 6:00 or 6:00 AM) AUTO: Changes between the day and night adjustments when you turn off or on the car headlights.*1 For KD-R960BTS, the display and button colors change according to the settings made on [COLOR]. *1 The illumination control wire connection is required. ( 31, 32) 22
-
 1
1 -
2
-
3
-
4
-
5
-
6
-
7
-
8
-
9
-
10
-
11
-
12
-
13
-
14
-
15
-
16
-
17
-
18
-
 19
19 -
 20
20 -
 21
21 -
 22
22 -
 23
23 -
 24
24 -
 25
25 -
 26
26 -
 27
27 -
 28
28 -
 29
29 -
30
-
31
-
32
-
33
-
34
-
35
-
36
-
37
-
38
-
39
-
40
-
41
-
42
-
43
-
44
-
45
-
46
-
47
-
48
-
49
-
50
-
51
-
52
-
53
-
54
-
55
-
56
-
57
-
58
-
59
-
60
-
61
-
62
-
63
-
64
-
65
-
66
-
67
-
68
-
69
-
70
-
71
-
72
-
73
-
74
-
75
-
76
-
77
-
78
-
79
-
80
-
81
-
82
-
83
-
84
-
85
-
86
-
87
-
88
-
89
-
90
-
91
-
92
-
93
-
94
-
95
-
96
-
97
-
98
-
99
-
100
 |
 |
