JVC KW-Z1000W Quick Start Guide America - Page 7
Initial Settings, Initial SETUP, Security Code Setup
 |
View all JVC KW-Z1000W manuals
Add to My Manuals
Save this manual to your list of manuals |
Page 7 highlights
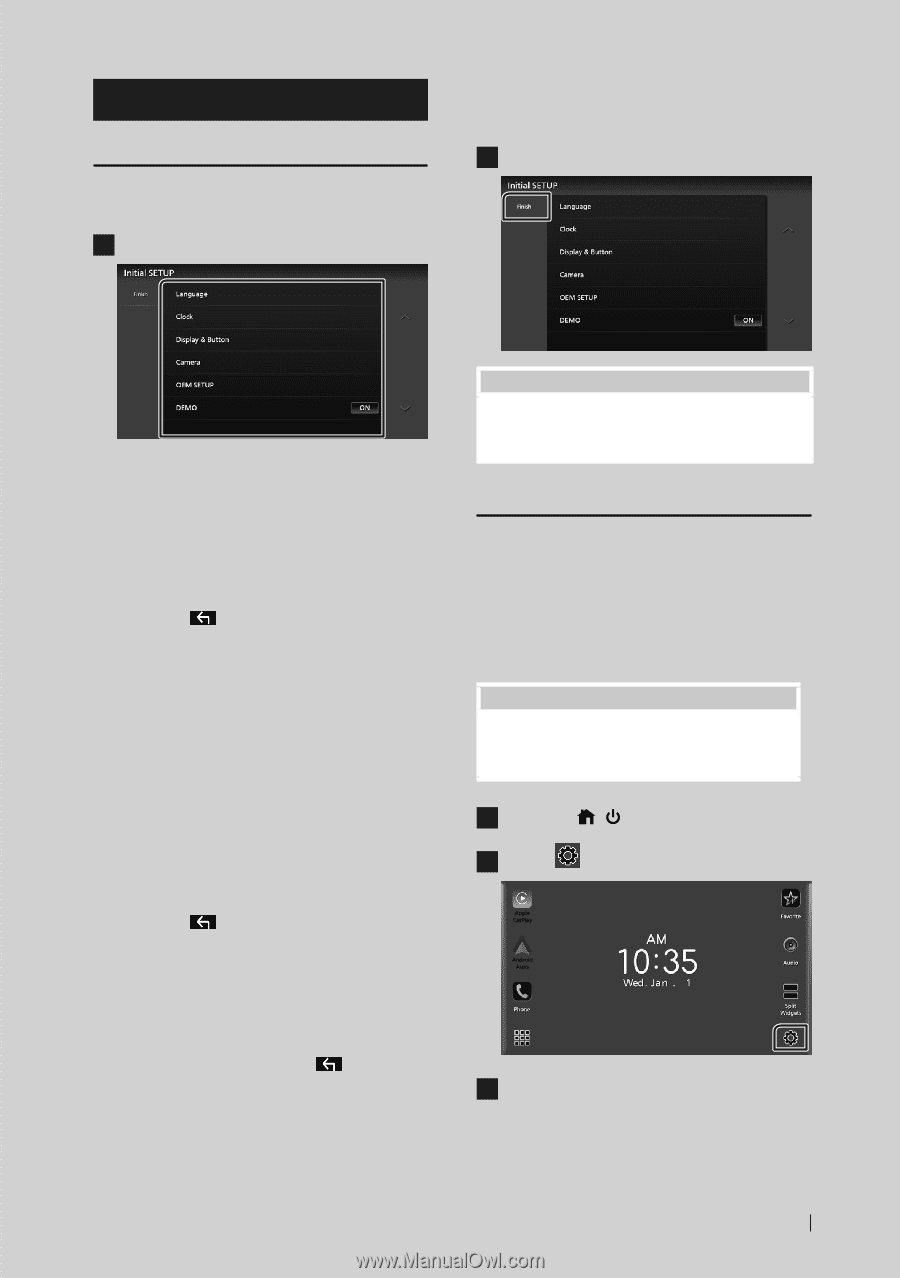
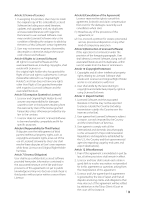
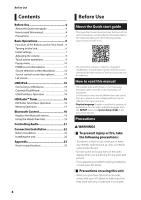
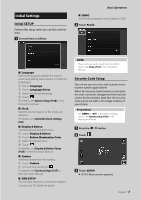
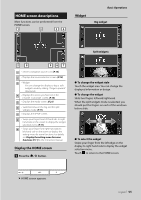
Initial Settings Initial SETUP Perform this setup when you use this unit first time. 1 Set each item as follows. Basic Operations ■■ [DEMO] Set the demonstration mode. Default is "ON". 2 Touch [Finish]. ■■ [Language] Select the language used for the control screen and setting items. Default is "American English(en)". 1 Touch [Language]. 2 Touch [Language Select]. 3 Select the desired language. 4 Touch [ ]. For details, see System Setup (P.68) in the Instruction Manual. ■■ [Clock] Sets the synchronization of the clock and adjusts it. For details, see Calendar/clock settings (P.8). ■■[Display & Button] Set the button illumination color. 1 Touch [Display & Button]. 2 Touch [Button Illumination Color]. 3 Select the desired color. 4 Touch [ ]. For details, see Display & Button Setup (P.65) in the Instruction Manual. ■■ [Camera] Set the parameters for the camera. 1 Touch [Camera]. 2 Set each item and touch [ ]. For details, see Camera Setup (P.47) in the Instruction Manual. ■■[OEM SETUP] This function requires a commercial adaptor. Consult your JVC dealer for details. NOTE • These settings can be made from the SETUP menu. See Setup (P.63) in the Instruction Manual. Security Code Setup You can set up a security code to protect your receiver system against theft. When the Security Code function is activated, the code cannot be changed and the function cannot be deactivated. Note that the Security Code can be set with a 4 to 8 digit number of your choice. Preparation • Set [DEMO] to [OFF] in the System setting menu. See System Setup (P.68) in the Instruction Manual. 1 Press the [ ]/[ ] button. 2 Touch [ ]. 3 Touch [SETUP]. hhSETUP Menu screen appears. English 7
-
 1
1 -
 2
2 -
 3
3 -
 4
4 -
 5
5 -
 6
6 -
 7
7 -
 8
8 -
 9
9 -
 10
10 -
 11
11 -
 12
12 -
13
-
14
-
15
-
16
-
17
-
18
-
19
-
20
-
21
-
22
-
23
-
24
-
25
-
26
-
27
-
28
-
29
-
30
-
31
-
32
-
33
-
34
-
35
-
36
-
37
-
38
-
39
-
40
-
41
-
42
-
43
-
44
-
45
-
46
-
47
-
48
-
49
-
50
-
51
-
52
-
53
-
54
-
55
-
56
-
57
-
58
-
59
-
60
-
61
-
62
-
63
-
64
-
65
-
66
-
67
-
68
-
69
-
70
-
71
-
72
-
73
-
74
-
75
-
76
-
77
-
78
-
79
-
80
-
81
-
82
-
83
-
84
-
85
-
86
-
87
-
88
-
89
-
90
-
91
-
92
-
93
-
94
-
95
-
96
-
97
-
98
-
99
-
100
-
101
-
102
-
103
-
104
 |
 |