JVC KWAVX706 Instructions - Page 8
Remote controller (RM-RK240), Installing the lithium coin battery CR2025 - manual
 |
View all JVC KWAVX706 manuals
Add to My Manuals
Save this manual to your list of manuals |
Page 8 highlights
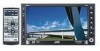
ENGLISH Basic operations - Remote controller (RM-RK240) Installing the lithium coin battery (CR2025) Main elements and features EXTRA MONITOR CONTROL MODE ASPECT MENU Before using the remote controller: • Aim the remote controller directly at the remote sensor on the unit. • DO NOT expose the remote sensor to bright light (direct sunlight or artificial lighting). The receiver is equipped with the steering wheel remote control function. • See the Installation/Connection Manual (separate volume) for connection. DVD / RECEIVER CONTROL ATT ZOOM SOURCE BAND DUAL VOL 2nd VOL SHIFT +10 -100 +100 -10 DIRECT ASPECT 1 TOP M 4 DISC+ 2 5 OSD 3 MENU 6 7 SETUP ENTER DISC- 8 0 9 RETURN SURROUND Warning: To prevent accidents and damage • Do not install any battery other than CR2025 or its equivalent. • Store the battery in a place where children cannot reach. • Do not recharge, short, disassemble, or heat the battery or dispose of it in a fire. • Do not leave the battery with other metallic materials. • Do not poke the battery with tweezers or similar tools. • Wrap the battery with tape and insulate when throwing away or saving it. IMPORTANT: If Dual Zone is activated ( page 24), the remote controller functions only for operating the DVD/CD player. MONITOR CONTROL 1 Monitor control buttons • Used for a JVC monitor-KV-MR9010, or KV-MH6510. DVD/RECEIVER CONTROL 2 • Turns on the power. • Attenuates the sound if the power is on. • Turns off the power if pressed and held (while the power is on). 3 Selects the source. 4 Selects the FM/AM, and satellite radio bands. 5 Changes the aspect ratio of the playback pictures. 6 Activates or deactivates Dual Zone. 7 Adjusts the volume level. • Also functions as 2nd VOL button when pressed with SHIFT button ( page 24). 8*1 • DVD: Shows the disc menu. • VCD: Resumes PBC playback ( page 19). 9*1 Not used as SETUP button for this receiver. p SHIFT button 8
-
 1
1 -
2
-
 3
3 -
 4
4 -
 5
5 -
 6
6 -
 7
7 -
 8
8 -
 9
9 -
 10
10 -
 11
11 -
 12
12 -
 13
13 -
14
-
15
-
16
-
17
-
18
-
19
-
20
-
21
-
22
-
23
-
24
-
25
-
26
-
27
-
28
-
29
-
30
-
31
-
32
-
33
-
34
-
35
-
36
-
37
-
38
-
39
-
40
-
41
-
42
-
43
-
44
-
45
-
46
-
47
-
48
-
49
-
50
-
51
-
52
-
53
-
54
-
55
-
56
-
57
-
58
-
59
-
60
-
61
-
62
-
63
-
64
-
65
-
66
-
67
-
68
-
69
-
70
-
71
-
72
-
73
-
74
-
75
-
76
-
77
-
78
-
79
-
80
-
81
-
82
-
83
-
84
-
85
-
86
-
87
-
88
-
89
-
90
-
91
-
92
-
93
-
94
-
95
-
96
-
97
-
98
-
99
-
100
-
101
-
102
-
103
-
104
-
105
-
106
-
107
-
108
-
109
-
110
-
111
-
112
-
113
-
114
-
115
-
116
-
117
-
118
-
119
-
120
-
121
-
122
-
123
-
124
-
125
-
126
-
127
-
128
-
129
-
130
-
131
-
132
-
133
-
134
-
135
-
136
-
137
-
138
-
139
-
140
-
141
-
142
-
143
-
144
-
145
-
146
-
147
-
148
-
149
-
150
-
151
-
152
-
153
-
154
-
155
-
156
-
157
-
158
-
159
-
160
-
161
-
162
-
163
-
164
-
165
-
166
-
167
-
168
-
169
-
170
-
171
-
172
-
173
-
174
-
175
-
176
-
177
 |
 |
