JVC MC2000 Instruction Manual - Page 6
SETTING UP, Connecting the unit - cd changer
 |
UPC - 046838256424
View all JVC MC2000 manuals
Add to My Manuals
Save this manual to your list of manuals |
Page 6 highlights
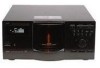
SETTING UP Connecting the unit This compact disc changer/player needs to be connected to an amplifier/receiver for audio reproduction. CAUTION Do not connect the AC power cord until all other necessary connections have been made. Analog audio connections First connect the OUTPUT jacks in the back of this unit with the CD or AUX input jacks of the amplifier/receiver using the accessory audio cord. Be sure to insert the audio cord plugs firmly into the proper jacks matching the output and input channels - RIGHT to RIGHT and LEFT to LEFT. OUTPUT LEFT Audio cord (White) RIGHT (Red) To input audio jack of the amplifier/receiver Digital audio connections If the MD, CD-R, amplifier or receiver you are making connections to has a digital optical input jack, connect the DIGITAL OUT OPTICAL jack in the back of this unit to the CD or AUX digital input jack on the MD, CD-R, amplifier or receiver using a commercially available optical fiber cable. Optical fiber cable (not supplied) DIGITAL OUT OPTICAL To digital input jack of the MD/CD-R/amplifier/ receiver Be sure to pull off the caps before you make any connections, as shown above. Place the caps in a safe place. System control connections If you are connecting the unit to a JVC audio component using the CompuLink-3 remote control system, connect the units with the accessory CompuLink cord. Either one of the COMPULINK-3 (SYNCHRO) jacks in the back of this unit can be used. COMPULINK-3 (SYNCHRO) CompuLink cord To CompuLink jack When you use this system, you can remote-control this CD unit from the connected JVC amplifier/receiver. (See Page 12 for more information.) NOTE: JVC components equipped with two COMPULINK-3 (SYNCHRO) ports can be connected in series; a component with only one jack may only be connected at the end of the series. Power connection Connect the accessory AC power cord into the socket in the back of this unit. Then insert the plugs into an AC outlet. (Do not connect the power cord to a switched AC outlet of a component if the CompuLink system is used.) AC power cord Wall outlet 43
-
 1
1 -
 2
2 -
 3
3 -
 4
4 -
 5
5 -
 6
6 -
 7
7 -
 8
8 -
 9
9 -
 10
10 -
 11
11 -
 12
12 -
13
-
14
-
15
-
16
-
17
-
18
-
19
-
20
 |
 |
