JVC TH-C60 Instructions - Page 15
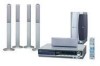
Speaker layout, Connecting a TV - subwoofer
 |
UPC - 046838023446
View all JVC TH-C60 manuals
Add to My Manuals
Save this manual to your list of manuals |
Page 15 highlights
Connections Do not connect the power cord until all other connections have been made. Speaker layout To obtain the best possible sound from this system, you need to place all the speakers except the subwoofer at the same distance from the listening position. Front left speaker Center speaker Front right speaker Powered subwoofer Surround left speaker Surround right speaker If your speakers cannot be placed at the same distance from the listening position You can adjust the delay time of the speakers. See "Delay menu (DELAY)" on page 35. NOTE • Place the satellite speakers on a flat and level surface. • The front and center speakers are magnetically shielded to avoid color distortions on TVs. However, if not installed properly, they may cause color distortions. So, pay attention to the following when installing the speakers. - When placing the speakers near a TV set, turn off the TV's main power switch or unplug it before installing the speakers. Then wait at least 30 minutes before turning on the TV's main power switch again. Some TVs may still be affected even though you have followed the above. If this happens, move the speakers away from the TV. • The surround speakers are not magnetically shielded. If they are located nearby the TV or monitor, it will probably cause color distortion on the screen. To avoid this, do not place the speakers nearby the TV or monitor. • Be sure to place the powered subwoofer to the TV's right. If you place the powered subwoofer to the TV's left, keep sufficient distance between them to prevent the TV screen from appearing mottled. Connecting a TV • Distortion of picture may occur when connecting to the TV via a VCR, or to a TV with a built-in VCR. • You need to set "MONITOR TYPE" in the PICTURE menu correctly according to the aspect ratio of your TV. (See page 34.) 7 To connect a TV equipped with the HDMI terminal HDMI connection allows you to enjoy high quality picture on your HDMI equipped TV with high-definition digital video signals. • You can select the type of video signal from 480p, 1080i, or 720p. (See page 18.) Center unit TV To HDMI input HDMI cable (not supplied) NOTE • This system outputs the signal to HDMI MONITOR OUT terminal only when the source is DVD or USB MEMORY. • This system outputs the audio signal of 48 kHz, 44.1 kHz, or 32 kHz Linear PCM from HDMI MONITOR OUT terminal. To activate or deactivate the audio signal output from HDMI MONITOR OUT terminal, see page 34. • HDMI indicator lights on the display window when the system and the TV recognize each other and are ready to send and receive signals. • When you enjoy HDCP contents, sound and picture may not be transmitted to the speakers and TV for a few seconds in the beginning for confirmation. What is HDMI? The HDMI (High Definition Multimedia Interface) is the standard interface for the next-generation TV. By connecting this system and a TV with the HDMI cable, digital video signals and audio signals are transmitted through the cable. You can enjoy digital video and sound without AD/DA conversion with easy connection. In addition, this system is compatible with HDCP (HighBandwidth Digital Content Protection), and HDCP contents can be viewed if you connect a HDCP compatible TV to this system. 7 To connect a TV equipped with the component video input jacks • With analog video connection, you can get better picture quality in the order - Component video > S-video > Composite video. • If your TV supports progressive video input, you can enjoy a high quality picture by setting the progressive scan mode to active. (See page 18.) TV To component video input Center unit Component video cord (not supplied) NOTE • While playing back DivX/ASF files, this system outputs only progressive signals from the component video jacks. When your TV does not support progressive video input, connect the TV through Svideo or composite video jack. • If the component video input jacks of your TV are of the BNC type, use a plug adapter (not supplied) to convert the pin plugs to BNC plugs. • The component video signals can be output only when you select DVD or USB MEMORY as the source to play. (See page 17.) 7 To connect a TV equipped with the composite or S-video jacks Center unit Composite video cord (supplied) or S-video cord (not supplied) Align the 5 marks. To S-video input To composite video input TV 12
-
 1
1 -
2
-
3
-
4
-
5
-
6
-
7
-
8
-
9
-
 10
10 -
 11
11 -
 12
12 -
 13
13 -
 14
14 -
 15
15 -
 16
16 -
 17
17 -
 18
18 -
 19
19 -
 20
20 -
21
-
22
-
23
-
24
-
25
-
26
-
27
-
28
-
29
-
30
-
31
-
32
-
33
-
34
-
35
-
36
-
37
-
38
-
39
-
40
-
41
-
42
-
43
-
44
-
45
-
46
-
47
-
48
-
49
-
50
-
51
-
52
-
53
-
54
-
55
-
56
-
57
-
58
-
59
-
60
-
61
-
62
-
63
-
64
-
65
-
66
-
67
-
68
-
69
-
70
-
71
-
72
-
73
-
74
-
75
-
76
-
77
-
78
-
79
-
80
-
81
-
82
-
83
-
84
-
85
-
86
-
87
-
88
 |
 |
