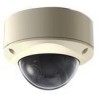
JVC TK-C215VP12U Instructions - Page 15
DAY/NIGHT] Easy DAY & NIGHT switch., SELECT] WHT.BAL./PHASE setting switch.
 |
UPC - 046838027482
View all JVC TK-C215VP12U manuals
Add to My Manuals
Save this manual to your list of manuals |
Page 15 highlights
G Function selection switches 1. [AGC] Auto-gain control switch. Setting this switch to AONB automatically increases the sensitivity even when the brightness of the subject is insufficient. (Default setting: ON) 2. [SELECT] WHT.BAL./PHASE setting switch. WHT.BAL.: The F [R/B,+/-] buttons are used as [R/B] adjustment buttons. PHASE: The F [R/B,+/-] buttons are used as [+/-] adjustment buttons. (Default setting: WHT.BAL.) 3. [SYNC] Synchronization system selection switch. This switch sets the synchronizing system for the camera. INT: This is set for internal synchronization LL (Line Lock): The camera's vertical synchronization is locked to the AC 24 V power line frequency. When switching between multiple cameras using a switcher, selecting this mode and adjusting the vertical phase can reduce the monitor sync disturbances occur that when the camera image is switched. U type: 60 Hz only E type: 50 Hz only (Default setting: INT) 4. [WHT.BAL.] ATW/MANUAL selection switch. For selecting whether to adjust the white balance automatically or manually. When the setting is changed from manual to ATW, the setting values in the manual mode will be reset. The camera switches to the same mode as with pressing the [RESET] button. (Default setting: ATW) Note: ● The white balance of this camera is preset to use under sunlight or halogen lamps, and may not be properly adjusted when used under artificial lights such as fluorescent lights. 5. [BLC] Backlight compensation switch. When the object is placed against the light, setting this to AONB increases the iris aperture by 1 stop and the object will appear brighter. (Default setting: OFF) 6. [DAY/NIGHT] Easy DAY & NIGHT switch. To capture a subject with continually changing brightness (day/night), set this switch to AONB The camera automatically captures the image in color when the subject is bright, and in black and white mode when it is dark. (Default setting: OFF) Note: ● When this item is set to AONB, the AGC feature will automatically be set to AONB regardless of the [AGC] Switch 1 setting. ● The Easy DAY & NIGHT feature on this camera uses a sensitized black and white mode unlike other black and white surveillance cameras that use infra-red lighting. ● Sensitivity increases in the case of black-andwhite images. The screen may therefore appear rougher and white spots may increase. 7. [ALARM] alarm input mode selection switch. For setting the lens movement when there is an alarm input. Set according to the alarm device that you are using. (A pg. 18 AElectrical Specifications of Alarm Input TerminalsB) (A pg. 25 AAdjusting the video imageB) TRIGGER: Upon input of an alarm, the lens moves to the preset zoom/focus position (alarm position). The lens remains in the alarm position for 15 seconds before it returns automatically to the home position. When there is a new alarm input while the lens is at the alarm position, the lens continues to remain in the alarm position for 15 seconds upon the last alarm input. STATE: Upon input of an alarm, the lens moves to the preset zoom/focus position (alarm position). The lens remains in the alarm position for 15 seconds. The lens will, after a lapse of 15 seconds, continue shooting at the alarm position as long as there is alarm input. The lens returns automatically to the home position immediately after alarm input stops. (Default setting: TRIGGER) 8. [RESET/SPOT] RESET/SPOT correction selection switch. RESET: The [RESET/SPOT] button E is used as a [RESET] button. SPOT: The [RESET/SPOT] button E is used as a [SPOT] button. (A Pg. 34) (Default setting: RESET) 15
-
 1
1 -
2
-
3
-
4
-
5
-
6
-
7
-
8
-
9
-
 10
10 -
 11
11 -
 12
12 -
 13
13 -
 14
14 -
 15
15 -
 16
16 -
 17
17 -
 18
18 -
 19
19 -
 20
20 -
21
-
22
-
23
-
24
-
25
-
26
-
27
-
28
-
29
-
30
-
31
-
32
-
33
-
34
-
35
-
36
-
37
-
38
-
39
-
40
 |
 |
