Jenn-Air JJW2527WS Use and Care - Page 6
Control Panel, Main Menus
 |
View all Jenn-Air JJW2527WS manuals
Add to My Manuals
Save this manual to your list of manuals |
Page 6 highlights
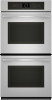
Control Panel The control panel houses the control menu and function controls. The control pads are very sensitive, and require only a light touch to activate. For more information about the individual controls, see their respective sections in this manual. Welcome Guide This appears on your display the first time the oven is powered up. The Welcome Guide allows you to set up your new oven. After every selection, a single beep will sound. 1. Select your language by pressing the quickset pad next to English or French. 2. Select the temperature units by pressing the quickset pad next to Fahrenheit or Celsius. 3. Select the clock units by pressing the quickset pad next to AM/PM or 24 Hour (Military Time). 4. Choose Yes or No to have the daylight saving time automatically updated. 5. Enter current time (00:00) using the number keypad and choose AM or PM by pressing the quickset pad next to the desired choice. Select Next to move to next screen. 6. Enter current date (MM/DD/YYYY) using the number keypad, and press the quickset pad next to the Next option. 7. Select a screen appearance to match your oven. Press the quickset pad next to Dark/Blue, Light/Blue, Dark/Orange, Bronze/White. 8. Review your settings and press the quickset pad next to Save option. A message will show: "You have selected a new theme. The oven will reset momentarily. Please wait...." It will take 1 minute to restart with the new settings set. 9. See the "Setup Menu" section for more detailed information. Display When the oven is in use (active mode), the display shows the time, mode, oven temperature and timer, if set. If the timer is not set, the Set Timer Option will also be displayed. After approximately 2 minutes of inactivity, the display will go into standby (sleep) mode, and the backlight of the display will dim. When the oven is in operation, the display will remain active. During programming, the display shows menus and the appropriate selections for the respective cooking function. Display Screen The LCD display screen is used to make menu selections, adjust settings and input commands. A Select mode: Bake Broil Auto Convection Conversion B MultiMode Convection 1 of 3 Back Start More C A. Title/description region B. Menu and selection/settings input region C. Command input region Menu selections and input adjustments are made in the center portion of the screen, and the command inputs (Back, More or Start) are made by the bottom buttons. Screen titles and descriptions are displayed in the top portion of the screen. A light to medium pressure touch of the fingertip will activate the menu selection. Main Menus From the Main Menu, all automatic cooking programs can be activated; all manual cooking can be programmed; settings can be programmed; settings can be adjusted; and instructions, preparation and tips can be accessed. Convection Model Bake Broil Back Select mode: Auto Convection Conversion MultiMode Convection 1 of 3 Start More Select mode: Convect Bake Convect Roast Convect Bake (Rapid Preheat) Back Start Convect Broil 1 of 2 More Select mode: Convect Slow Roast Convect Frozen Pizza Convect Pastry Back Start 2 of 2 More Proof Select mode: Keep Warm Rapid Proof Probe 2 of 3 Back Start More 6 Select mode: My Creations Button Lock Self Clean Back Start Setup Menu 3 of 3 More
-
 1
1 -
 2
2 -
 3
3 -
 4
4 -
 5
5 -
 6
6 -
 7
7 -
 8
8 -
 9
9 -
 10
10 -
 11
11 -
 12
12 -
13
-
14
-
15
-
16
-
17
-
18
-
19
-
20
-
21
-
22
-
23
-
24
-
25
-
26
-
27
-
28
-
29
-
30
-
31
-
32
-
33
-
34
-
35
-
36
-
37
-
38
-
39
-
40
-
41
-
42
-
43
-
44
-
45
-
46
-
47
-
48
-
49
-
50
-
51
-
52
-
53
-
54
-
55
-
56
-
57
-
58
-
59
-
60
-
61
-
62
-
63
-
64
 |
 |
