Jenn-Air JUW24FLECX Use and Care - Page 4
Installation Requirements
 |
View all Jenn-Air JUW24FLECX manuals
Add to My Manuals
Save this manual to your list of manuals |
Page 4 highlights
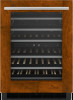
INSTALLATION REQUIREMENTS Tools and Parts Gather the required tools and parts before starting installation. Tool Needed: ■ Phillips screwdriver Parts Needed: ■ Custom Overlay Panel-See "Overlay Panel-Rear View." ■ Hardware (optional) Part Supplied: ■ M4 x 14 wood screws (8) Location Requirements WARNING Opening Dimensions ■ Height dimensions are shown with the leveling legs extended to the minimum height. NOTE: When leveling legs are fully extended, add 15.9 mm) to the height dimensions. See "Product Dimensions." ■ If the floor of the opening is not level with the kitchen floor, shim the opening to make it level with the kitchen floor. 143/4" (375 mm) A 1/2" (13 mm) 343/8" (873 mm) min. 35" (889 mm) max. Explosion Hazard Keep flammable materials and vapors, such as gasoline, away from wine cellar. Failure to do so can result in death, explosion, or fire. NOTES: ■ For the wine cellar to be flush with the front of the base cabinets, remove any baseboards or moldings from the rear of the opening. See "Product Dimensions" and later in this section, "Opening Dimensions." ■ It is recommended that you do not install the wine cellar near an oven, radiator, or other heat source. ■ Do not install in a location where the temperature will fall below 55°F (13°C). For best performance, do not install the wine cellar behind a cabinet door or block the base grille. 24" (609.6 mm) min. B 24" (609.6 mm) min. Critical Dimensions: A. 14³⁄₄" (375 mm) utility opening B. 24" (609.6 mm) minimum opening width Product Dimensions ■ Height dimensions are shown with the leveling legs NOT extended. ■ The power cord is 60" (1.52 m) long. Front View 1/4" (6.35 mm) 2 1/2" (63.5 mm) 4
-
 1
1 -
 2
2 -
 3
3 -
 4
4 -
 5
5 -
 6
6 -
 7
7 -
 8
8 -
 9
9 -
 10
10 -
11
-
12
-
13
-
14
-
15
-
16
-
17
-
18
-
19
-
20
-
21
-
22
-
23
-
24
-
25
-
26
-
27
-
28
-
29
-
30
-
31
-
32
-
33
-
34
-
35
-
36
-
37
-
38
-
39
-
40
-
41
-
42
-
43
-
44
 |
 |
