Jensen PCR2500CS Owners Manual - Page 4
Installation Instructions
 |
View all Jensen PCR2500CS manuals
Add to My Manuals
Save this manual to your list of manuals |
Page 4 highlights
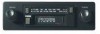
INSTALLATION INSTRUCTIONS Mounting the Radio 1. Thread a shaft nut half-way down each radio shaft. 2. Place a metal backup plate on each radio shaft against the shaft nut. 3. Position the radio behind the dashboard with the backup plates snug against the back of the opening. Adjust the shaft nuts behind the backup plates so the radio extends through the opening and is flush with the front of the trimplate. 4. Place the trimplate over the front of the radio and secure it by placing a shaft nut on each radio shaft. 5. Attach one end of the perforated support strap (supplied) to the screw stud on the radio using the hex nut provided. Bend the strap into position as necessary. 6. Install the knobs on the radio. Installation Using a Kit 1. If your vehicle requires the use of an installation kit to mount this radio, follow the instructions included with the installation kit to attach the radio to the mounting plate supplied with the kit. 2. Wire and test the radio as described in "Wiring the Radio" on page 3. Support Strap Hex Nut PCR2500 3. Install the radio/mounting plate assembly to the sub-dashboard according to the instructions of the installation kit. 4. Attach the support strap to the radio and dashboard as described in "Mounting the Radio". 5. Replace the dashboard trimpanel and install the knobs on the radio shafts. Shaft Nut CAUTION: The rear of the radio must be supported with the strap to prevent damage to the dashboard from the weight of the radio or improper operation due to vibration. Metal Part of Dash Trimplate Dashboard 4
-
 1
1 -
 2
2 -
 3
3 -
 4
4 -
 5
5 -
 6
6 -
 7
7 -
 8
8 -
 9
9 -
 10
10 -
11
-
12
-
13
-
14
-
15
-
16
-
17
-
18
-
19
-
20
-
21
-
22
-
23
-
24
 |
 |
