Karcher FP 303 Operating instructions - Page 11
Operation - pads
 |
View all Karcher FP 303 manuals
Add to My Manuals
Save this manual to your list of manuals |
Page 11 highlights
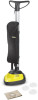
Remove transport lock Illustration Remove the transport locks the first time you use and before using the appliance by pulling them off. Assemble the strut and attach it Illustration Assemble both parts of the strut and se- cure with the enclosed screw and nut. Insert the entire strut into the polishing head and attach with a screw. Note: Here, take into account the location of the mains cable. Illustration Press the mains cable into the attachments and tension it. Connect suction hose Illustration Insert the straight end of the suction hose into the polishing head, insert the bent end into the strut connection. Inserting the cloth bag Illustration First, push the upper part of the cloth bag into the intake until it locks. Then attach the bottom part to the strut using the Velcro pad. Inserting a filter bag Illustration Open the zipper of the cloth bag. Insert the filter bag and slide the carton with the opening over the support until it locks into place. Recheck the correct positioning of the filter bag. Close the zipper on the cloth bag. Insert pad holder Illustration Place the appliance on the floor so that the polishing head is positioned perpendicular to the surface. Simply press the pad holder into the intake. Ensure that the noses of the pad holders lock well into the intake. To remove the pad holders, simply pull them off. Insert the polishing pads Illustration Install the polishing pads on the pad holders and ensure that they are centered properly. To remove the polishing pads, simply pull them off. Storing the polishing pads The polishing pads can be stored in a separate compartment in the bottom part of the cloth bag. Operation Note: Always work with the filter bag inserted. ṇ Caution Before inserting the mains plug, ensure that the strut is located in a vertical position. The appliance is switched off in this position. Illustration Turn the upper cable hook and remove the mains cable. Insert the mains plug into a socket. Illustration Press hold down the unlocking key. Pull the shaft in the rear direction. The device is activated. To stop the appliance, bring the strut back to the vertical position until it locks. EN - 5 11
-
 1
1 -
2
-
3
-
4
-
5
-
 6
6 -
 7
7 -
 8
8 -
 9
9 -
 10
10 -
 11
11 -
 12
12 -
 13
13 -
 14
14 -
 15
15 -
 16
16 -
17
-
18
-
19
-
20
-
21
-
22
-
23
-
24
-
25
-
26
-
27
-
28
-
29
-
30
-
31
-
32
-
33
-
34
-
35
-
36
-
37
-
38
-
39
-
40
-
41
-
42
-
43
-
44
-
45
-
46
-
47
-
48
-
49
-
50
-
51
-
52
-
53
-
54
-
55
-
56
-
57
-
58
-
59
-
60
-
61
-
62
-
63
-
64
-
65
-
66
-
67
-
68
-
69
-
70
-
71
-
72
-
73
-
74
-
75
-
76
-
77
-
78
-
79
-
80
-
81
-
82
-
83
-
84
-
85
-
86
-
87
-
88
-
89
-
90
-
91
-
92
-
93
-
94
-
95
-
96
-
97
-
98
-
99
-
100
-
101
-
102
-
103
-
104
-
105
-
106
-
107
-
108
-
109
-
110
-
111
-
112
-
113
-
114
-
115
-
116
-
117
-
118
-
119
-
120
-
121
-
122
-
123
-
124
-
125
-
126
-
127
-
128
-
129
-
130
-
131
-
132
-
133
-
134
-
135
-
136
-
137
-
138
-
139
-
140
-
141
-
142
-
143
-
144
-
145
-
146
-
147
-
148
-
149
-
150
-
151
-
152
-
153
-
154
-
155
-
156
-
157
-
158
-
159
-
160
-
161
-
162
-
163
-
164
-
165
-
166
-
167
-
168
-
169
-
170
-
171
-
172
-
173
-
174
-
175
-
176
-
177
-
178
-
179
-
180
-
181
-
182
-
183
-
184
-
185
-
186
-
187
-
188
 |
 |
