Kenmore 204101 Use and Care Manual - Page 5
the power cord is unplugged., Place Bbnder motor/base on a dry, level, stable surface
 |
UPC - 836607000712
View all Kenmore 204101 manuals
Add to My Manuals
Save this manual to your list of manuals |
Page 5 highlights
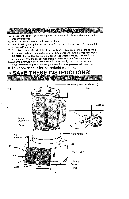
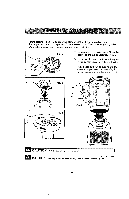
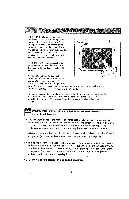
Your blender has been designed to work in a variety of ways to suit your blending needs. Once you plug the blender in, The LED light display is illuminated. Operate the blender in either continuous or pulse made by pressing the speed buttons. The soft start Function begins blending action slowly, and then picks up to maximum setting speed. 1. Make sure the power cord is unplugged. 2, Place Bbnder motor/base on a dry, level, stable surface, 3. Set jar assembly into place on motor/base, making sure motor/base and jar are securely tightened into place. 4. Place the _ood solids and liquids to be blended into the jar and put the lid on the jar before blending. Be sure _he measuring cup is _nplace in the middle of the lid. 5. Plug power cord into a standard 120-V, 60 Hz AC-onty, 3-prong electrical outlet. The blue LCD will display 0:00 for the timer, and the blue OFF indicalor will illuminate (Fig, 7). Fig. 6 Fig, 7
-
 1
1 -
 2
2 -
 3
3 -
 4
4 -
 5
5 -
 6
6 -
 7
7 -
 8
8 -
 9
9 -
 10
10 -
 11
11 -
12
-
13
-
14
 |
 |
