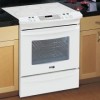
Kenmore 4101 Use and Care Guide - Page 13
Surface, Oven Controls
 |
View all Kenmore 4101 manuals
Add to My Manuals
Save this manual to your list of manuals |
Page 13 highlights
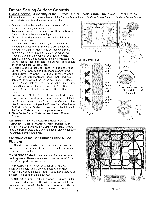
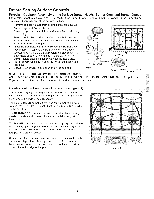
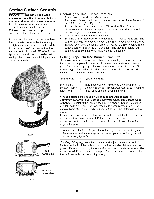
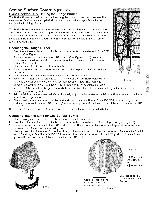
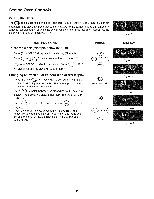
Surface Cooking Care & Seasoning of the Griddle (some models) Before first use: ,, Wash Griddle in hot soapy water. Rinse and then dry completely. ,, Apply a thin coat of vegetable oil to the entire surface (front and back of griddle). ,, Preheat your oven to 350°R Place the griddle on the upper rack in your oven. ,, Bake griddle for 1 hour at 350°E then turn oven OFF and let cool before remov- ing. ,, The surface may appear to have a tacky feel to it from the seasoning process, if desired, wash the griddle in hot soapy water, rinse well, and dry completely. After each use: ,, To prevent rusting, store in a dry place and keep uncovered. ,, After each use, clean with a stiff brush and hot water only. • DO NOT CLEAN GRIDDLE IN DISHWASHER. ,, Dry Immediately and apply a light coating of vegetable oil to griddle before storing. Using the Griddle: ,, Place either side of the griddle centered over the left side gas burners or over the Bridge Burner. For location refer to Figure 1. ,, Preheat the griddle for 5 minutes on medium to medium low setting. Slow preheat ensures even heat distribution during the cooking process. ,, DO NOT preheat the griddle on HI setting. Preheating on HI may warp the griddle and prevent even heat distribution. Before Setting Oven Controls Figure 1 i _to run after theTrhainsgreanhgaes hbaesean fatunrntheadt w"OillFtFu"r,n b"0utNm" aynda"lsOoFFs"topbyimitsmeelfdtoiatkeeleyp athned ethleecntrotnurnits"OcoNo"l. aIfttmeraya cwohniltei .hue Oven Vent Location The oven vent is located at right side of the front panel and visible when the oven door is open. When the oven is on, hot air is released through the vents. This venting is necessary for proper air circulation in the oven and good baking results. OVEN VENT Removing and Replacing Oven Racks To remove, pull the rack forward until it stops. Lift up front of rack and slide out. To replace, fit the rack onto the guides on the oven walls. Tilt the front of the rack upward and slide the rack back into place. 13
-
 1
1 -
2
-
3
-
4
-
5
-
6
-
7
-
 8
8 -
 9
9 -
 10
10 -
 11
11 -
 12
12 -
 13
13 -
 14
14 -
 15
15 -
 16
16 -
 17
17 -
 18
18 -
19
-
20
-
21
-
22
-
23
-
24
-
25
-
26
-
27
-
28
-
29
-
30
-
31
-
32
-
33
-
34
-
35
-
36
-
37
-
38
-
39
-
40
-
41
-
42
-
43
-
44
-
45
-
46
-
47
-
48
 |
 |
