Kenmore 4689 Use and Care Guide - Page 25
General, & Cleaning
 |
View all Kenmore 4689 manuals
Add to My Manuals
Save this manual to your list of manuals |
Page 25 highlights
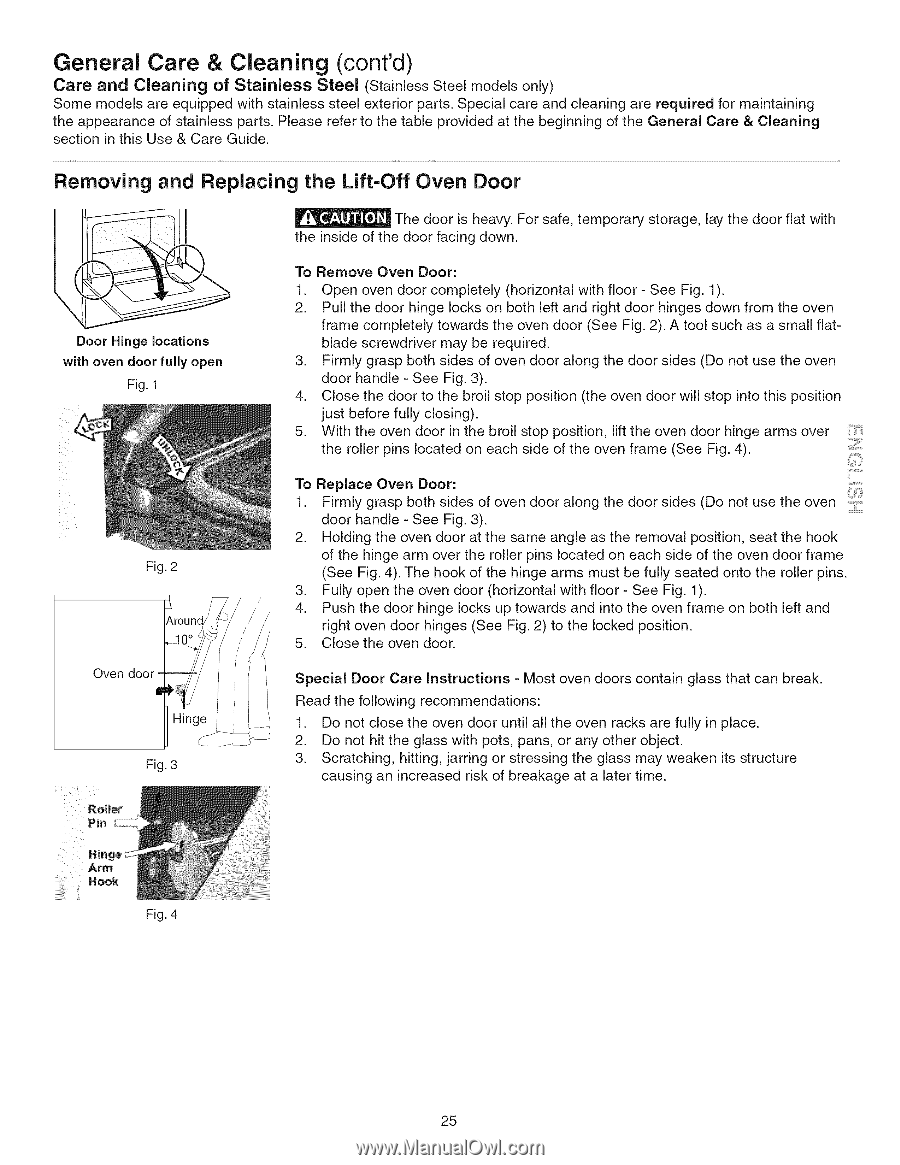
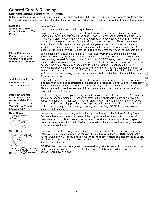
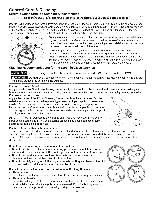
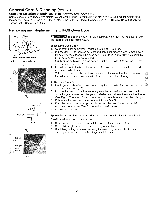
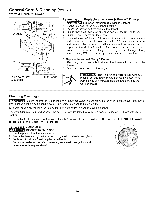
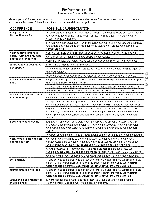
General Care & Cleaning (cont'd) Care and Cleaning of Stainless Steel (Stainless Steel models only) Some models are equipped with stainless steel exterior parts. Special care and cleaning are required for maintaining the appearance of stainless parts. Please refer to the table provided at the beginning of the General Care & Cleaning section in this Use & Care Guide. Removing and Replacing the Lift-Off Oven Door The door is heavy. For safe, temporary storage, lay the door flat with the inside of the door facing down. Door Hinge locations with oven door fully open Fig. 1 To Remove Oven Door: 1. Open oven door completely (horizontal with floor - See Fig. 1). 2. Pull the door hinge locks on both left and right door hinges down from the oven frame completely towards the oven door (See Fig. 2). A tool such as a small flat- blade screwdriver may be required. 3. Firmly grasp both sides of oven door along the door sides (Do not use the oven door handle - See Fig. 3). 4. Close the door to the broil stop position (the oven door will stop into this position just before fully closing). 5. With the oven door in the broil stop position, lift the oven door hinge arms over the roller pins located on each side of the oven frame (See Fig. 4). iii!"!il"_iiii iiiiiii_il;_;!i Fig. 2 Oven Fig. 3 To Replace Oven Door: 1. Firmly grasp both sides of oven door along the door sides (Do not use the oven door handle - See Fig. 3). 2. Holding the oven door at the same angle as the removal position, seat the hook of the hinge arm over the roller pins located on each side of the oven door frame (See Fig. 4). The hook of the hinge arms must be fully seated onto the roller pins. 3. Fully open the oven door (horizontal with floor - See Fig. 1). 4. Push the door hinge locks up towards and into the oven frame on both left and right oven door hinges (See Fig. 2) to the locked position. 5. Close the oven door. Special Door Care Instructions - Most oven doors contain glass that can break. Read the following recommendations: 1. Do not close the oven door until all the oven racks are fully in place. 2. Do not hit the glass with pots, pans, or any other object. 3. Scratching, hitting, jarring or stressing the glass may weaken its structure causing an increased risk of breakage at a later time. Fig. 4 25
-
 1
1 -
2
-
3
-
4
-
5
-
6
-
7
-
8
-
9
-
10
-
11
-
12
-
13
-
14
-
15
-
16
-
17
-
18
-
19
-
 20
20 -
 21
21 -
 22
22 -
 23
23 -
 24
24 -
 25
25 -
 26
26 -
 27
27 -
 28
28 -
 29
29 -
 30
30
 |
 |