Kenmore 4812 Installation Instructions - Page 11
opening.
 |
View all Kenmore 4812 manuals
Add to My Manuals
Save this manual to your list of manuals |
Page 11 highlights
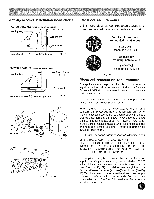
_ Carefully slide range into cabinet opening. Carefully slide range into cabinet opening while inserting rear leveling leg into and FULLY ENGAGING THE ANTI-TIP BRACKET (See Fig. 26). Make sure that the flexible appliance conduit (Fig. 18) and the power cord (Fig. 20) folds into the remaining open floor area behind the range warmer or storage drawer. Make sure that the flexible appliance conduit does not become pinched or kinked! Preshape the flexible appliance conduit and power cord if necessary to insure that the range slides into cabinet opening properly. Be sure to check level of the range by placing a level horizontally on an oven rack (See Fig. 27). Example of Burner Assembly_ Burner Cap ® Burner Skirt Cooktop Layout Front of cooktop Surface burner heads, cap & grates. Your range is shipped with the Burner Heads and Burner Caps in the correct locations. Packing material is located between the Burner Heads and Burner Skirts. 1. Be sure to follow the Installation Instructions before installing and using your new range. 2. Remove all packing tape from cooktop area. Remove all Burner Caps and Burner Heads. 3. Discard all packing material located under Burner Heads. 4. To replace Burner Heads & Caps, match the letters located under center of Burner Caps with the letters located inside Burner Heads (Fig. 38). 5. Match the letters stamped on Burner Skirts with Burner Heads and Burner Caps (See Fig. 38). Replace the Burner Heads and Caps on cooktop (See Fig. 38). Carefully align the Electrodes into slot or hole of each Burner Head (Fig. 38). Note: The Burner Heads should sit flat on Cooktop Burner Skirts. 6. Unpack Burner Grates and position on the cooktop. REMEMBER -- DO NOT ALLOW SPILLS, FOOD, CLEANING AGENTS OR ANY OTHER MATERIAL TO ENTER THE GAS ORIFICE HOLDER OPENING. Always keep the Burner Caps and Burner Heads in place whenever the surface burners are in use. Fig. 38 each Burner Head Check electric ignition of surface burners. Operation of electric igniters should be checked after range and supply line connectors have been carefully checked for leaks and range has been connected to electric power. 1. To check for proper lighting, push in and turn surface burner knob counterclockwise to the _(lite) position. You will hear the igniter sparking ( Fig. 39). 2. The surface burner should light when gas is available to the top burner. Purge air from supply lines by leaving knob in the ,_(lite) position until burner ignites. Each burner should light within four (4) seconds in normal operation after air has been purged from supply lines. 3. Visually check that the burner has lit. Once the burner lites, turn the control knob out of the _(lite) position. 4. The range has separate electrodes (igniters) for each burner. Try each knob separately until all burner valves have been checked.
-
 1
1 -
2
-
3
-
4
-
5
-
 6
6 -
 7
7 -
 8
8 -
 9
9 -
 10
10 -
 11
11 -
 12
12
 |
 |
