Kenmore 6929 Use and Care Guide - Page 14
andrefrigerator
 |
View all Kenmore 6929 manuals
Add to My Manuals
Save this manual to your list of manuals |
Page 14 highlights
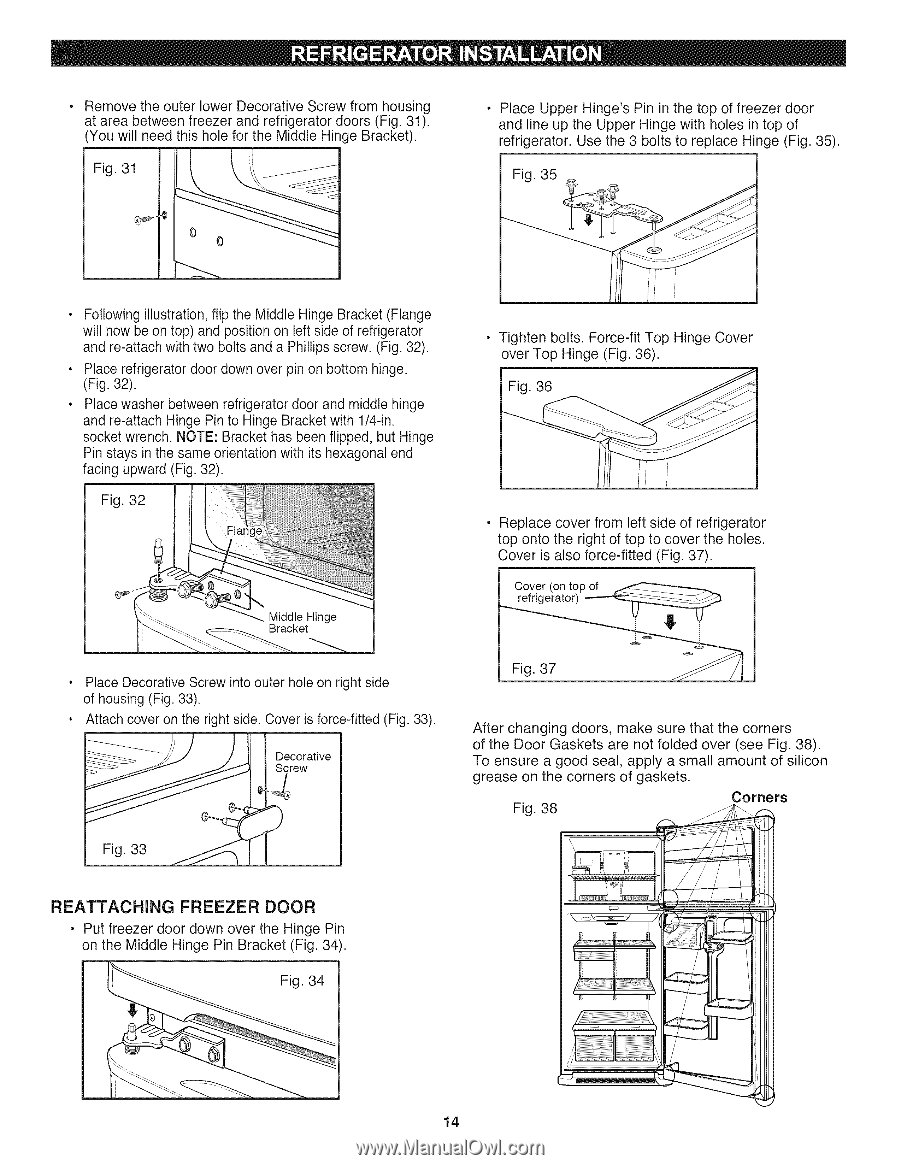
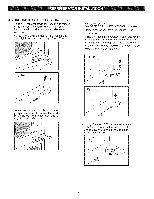
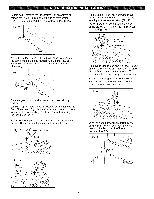
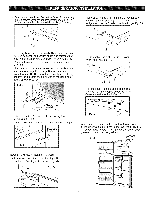
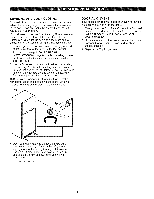
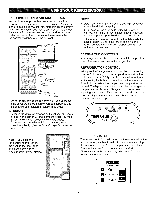
RemovteheouterlowerDecorativSecrewfromhousing atareabetweefnreezear ndrefrigeratodroors(Fig.31). YouwillneedthisholefortheMiddleHingeBracket). Fig.31 PlaceUpperHinge'sPininthetopoffreezedr oor andlineuptheUpperHingewithholesintopof refrigerator. Use the 3 bolts to replace Hinge (Fig. 35). Fig. 35 • Following illustration, flip the Middle Hinge Bracket (Flange will now be on top) and position on left side of refrigerator and re-attach with two bolts and a Phillips screw. (Fig. 32). • Place refrigerator door down over pin on bottom hinge. (Fig. 32). • Place washer between refrigerator door and middle hinge and re-attach Hinge Pin to Hinge Bracket with 1/4-in. socket wrench. NOTE: Bracket has been flipped, but Hinge Pin stays in the same orientation with its hexagonal end facing upward (Fig. 32). Fig. 32 Bracket • Tighten bolts. Force-fit Top Hinge Cover over Top Hinge (Fig. 36). Fig. 36 • Replace cover from left side of refrigerator top onto the right of top to cover the holes. Cover is also force-fitted (Fig. 37). Cover (on top of _----_----A_ Place Decorative Screw into outer hole on right side of housing (Fig. 33). Attach cover on the right side. Cover is force-fitted (Fig. 33). -_ ..... /J / I I Decorative €l S_rew After changing doors, make sure that the corners of the Door Gaskets are not folded over (see Fig. 38). To ensure a good seal, apply a small amount of silicon grease on the corners of gaskets. Fig. 38 Corners \ / REATTACHING FREEZER DOOR • Put freezer door down over the Hinge Pin on the Middle Hinge Pin Bracket (Fig. 34). Fig. 34 14
-
 1
1 -
2
-
3
-
4
-
5
-
6
-
7
-
8
-
 9
9 -
 10
10 -
 11
11 -
 12
12 -
 13
13 -
 14
14 -
 15
15 -
 16
16 -
 17
17 -
 18
18 -
 19
19 -
20
-
21
-
22
-
23
-
24
-
25
-
26
-
27
-
28
-
29
-
30
-
31
-
32
 |
 |