Kenmore 7703 Use and Care Guide - Page 21
Troubleshooting
 |
View all Kenmore 7703 manuals
Add to My Manuals
Save this manual to your list of manuals |
Page 21 highlights
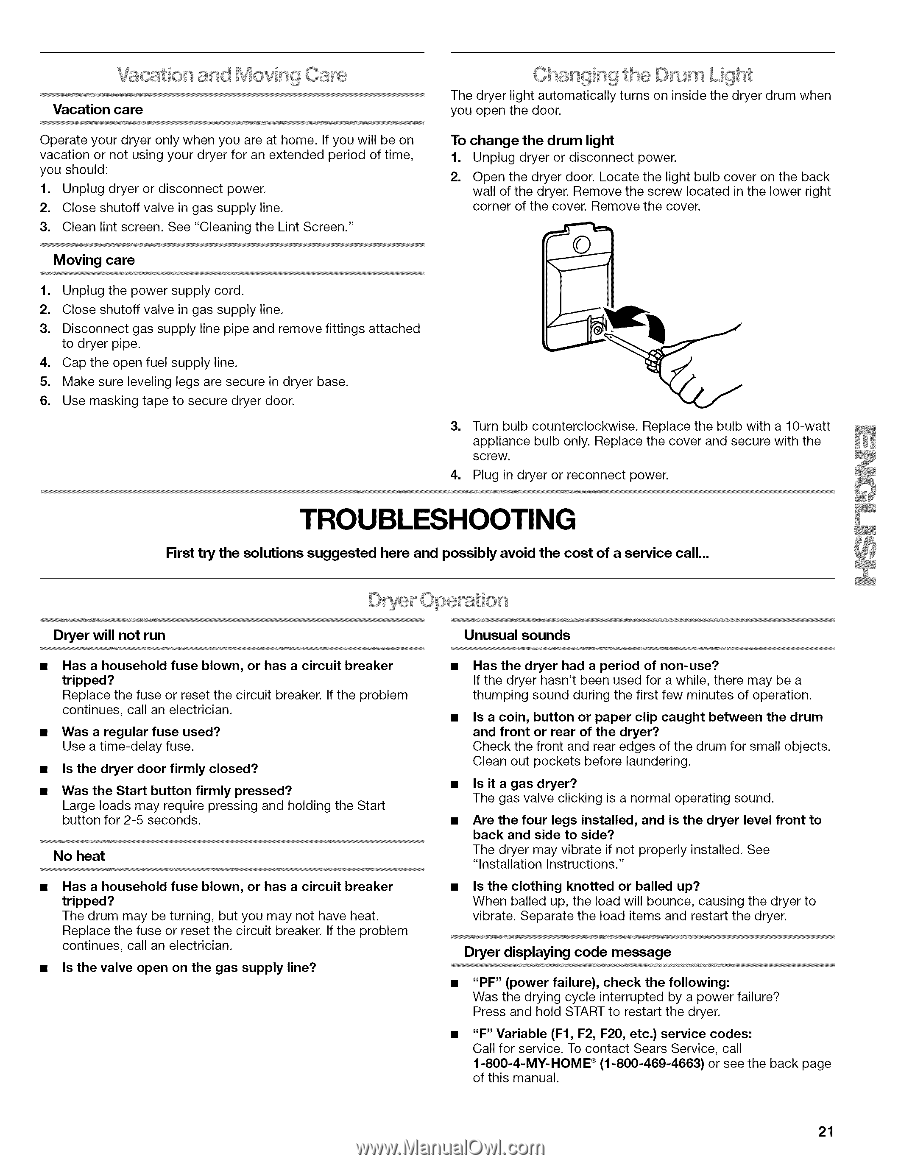
Vacation care Operate your dryer only when you are at home. If you will be on vacation or not using your dryer for an extended period of time, you should: 1. Unplug dryer or disconnect power. 2. Close shutoff valve in gas supply line. 3. Clean lint screen. See "Cleaning the Lint Screen." The dryer light automatically turns on inside the dryer drum when you open the door. To change the drum light 1. Unplug dryer or disconnect power. 2. Open the dryer door. Locate the light bulb cover on the back wall of the dryer. Remove the screw located in the lower right corner of the cover. Remove the cover. Moving care 1. Unplug the power supply cord. 2. Close shutoff valve in gas supply line. 3. Disconnect gas supply line pipe and remove fittings attached to dryer pipe. 4. Cap the open fuel supply line. 5. Make sure leveling legs are secure in dryer base. 6. Use masking tape to secure dryer door. 3. Turn bulb counterclockwise. Replace the bulb with a 10-watt appliance bulb only. Replace the cover and secure with the SCreW. 4. Plug in dryer or reconnect power. TROUBLESHOOTING First try the solutions suggested here and possibly avoid the cost of a service call... Dryer will not run Has a household fuse blown, or has a circuit breaker tripped? Replace the fuse or reset the circuit breaker. If the problem continues, call an electrician. Was a regular fuse used? Use a time-delay fuse. Is the dryer door firmly closed? Was the Start button firmly pressed? Large loads may require pressing and holding the Start button for 2-5 seconds. No heat Has a household fuse blown, or has a circuit breaker tripped? The drum may be turning, but you may not have heat. Replace the fuse or reset the circuit breaker. If the problem continues, call an electrician. • is the valve open on the gas supply line? Unusualsounds • Has the dryer had a period of non-use? If the dryer hasn't been used for a while, there may be a thumping sound during the first few minutes of operation. msa coin, button or paper clip caught between the drum and front or rear of the dryer? Check the front and rear edges of the drum for small objects. Clean out pockets before laundering. • is it a gas dryer? The gas valve clicking is a normal operating sound. Are the four legs installed, and is the dryer level front to back and side to side? The dryer may vibrate if not properly installed. See "Installation Instructions." • is the clothing knotted or balled up? When balled up, the load will bounce, causing the dryer to vibrate. Separate the load items and restart the dryer. Dryer displaying code message • "PF" (power failure), check the following: Was the drying cycle interrupted by a power failure? Press and hold START to restart the dryer. "F" Variable iF1, F2, F20, etc.) service codes: Call for service. To contact Sears Service, call 1-800-4-MY-HOME ®(1-800-469-4663) or see the back page of this manual. 21
-
 1
1 -
2
-
3
-
4
-
5
-
6
-
7
-
8
-
9
-
10
-
11
-
12
-
13
-
14
-
15
-
 16
16 -
 17
17 -
 18
18 -
 19
19 -
 20
20 -
 21
21 -
 22
22 -
 23
23 -
 24
24 -
 25
25 -
 26
26 -
27
-
28
-
29
-
30
-
31
-
32
-
33
-
34
-
35
-
36
-
37
-
38
-
39
-
40
-
41
-
42
-
43
-
44
-
45
-
46
-
47
-
48
 |
 |