Kenmore 7817 Use and Care Guide - Page 7
Door Removal And Reversal, Instructions - door handle
 |
View all Kenmore 7817 manuals
Add to My Manuals
Save this manual to your list of manuals |
Page 7 highlights
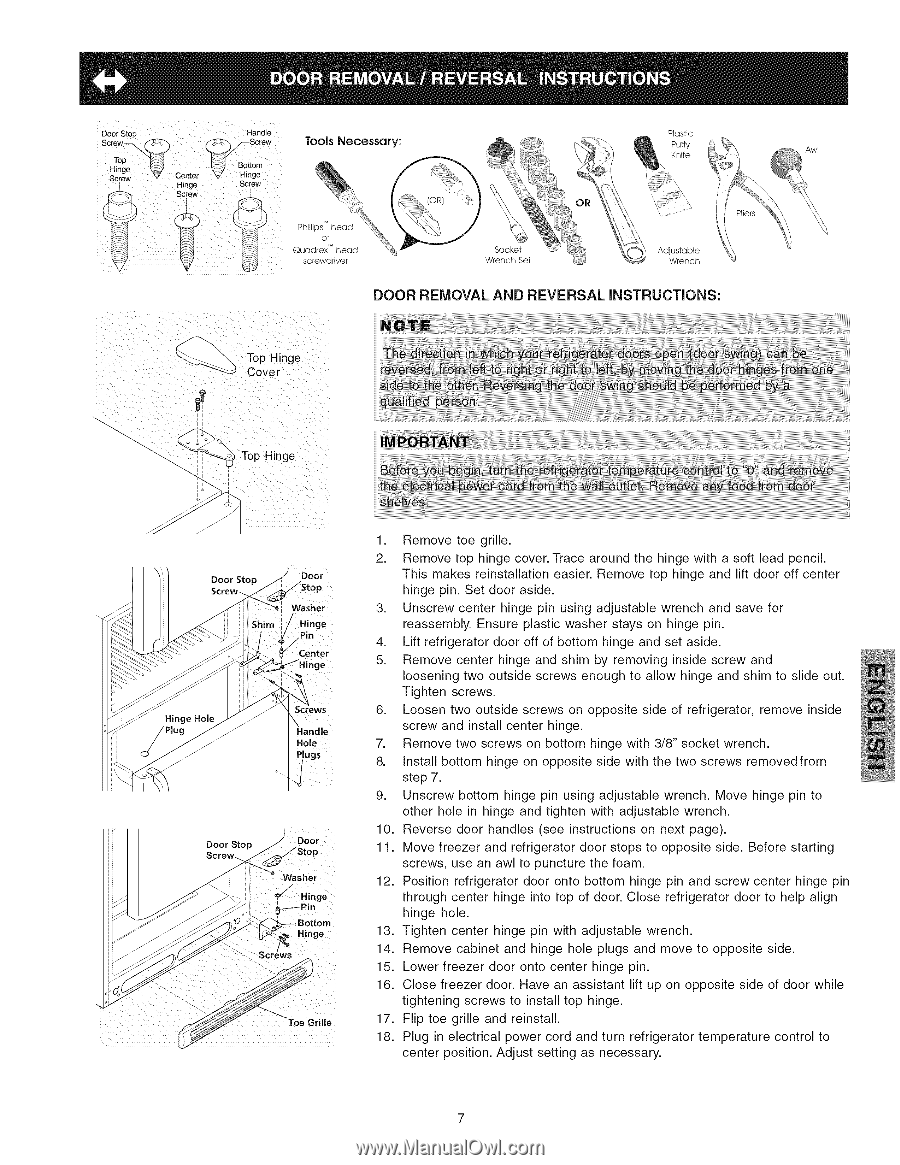
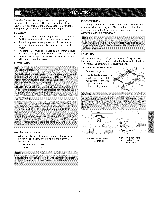
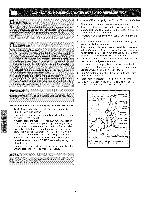
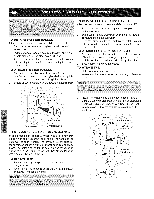
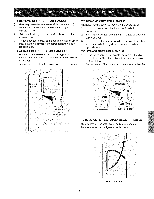
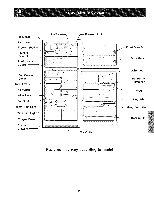
Door Sto # Screw -- Top Hinge I Handle Tools Necessary: Plastic Putty Knife Phillips'" head or Quadrex'" head screwdriver Socket Wrench Set Adjustable Wrench DOOR REMOVAL AND REVERSAL INSTRUCTIONS: Top Hinge Cover Door Stop Screw Washer Hole ugs Door Stop Hinge .Pin , Hinge 1. Remove toe grille. 2. Remove top hinge cover. Trace around the hinge with a soft lead pencil. This makes reinstallation easier. Remove top hinge and lift door off center hinge pin. Set door aside. 3. Unscrew center hinge pin using adjustable wrench and save for reassembly. Ensure plastic washer stays on hinge pin. 4. Lift refrigerator door off of bottom hinge and set aside. 5. Remove center hinge and shim by removing inside screw and loosening two outside screws enough to allow hinge and shim to slide out. Tighten screws. 6. Loosen two outside screws on opposite side of refrigerator, remove inside screw and install center hinge. 7. Remove two screws on bottom hinge with 3/8" socket wrench. 8. Install bottom hinge on opposite side with the two screws removedfrom step 7. 9. Unscrew bottom hinge pin using adjustable wrench. Move hinge pin to other hole in hinge and tighten with adjustable wrench. 10. Reverse door handles (see instructions on next page). 11. Move freezer and refrigerator door stops to opposite side. Before starting screws, use an awl to puncture the foam. 12. Position refrigerator door onto bottom hinge pin and screw center hinge pin through center hinge into top of door. Close refrigerator door to help align hinge hole. 13. Tighten center hinge pin with adjustable wrench. 14. Remove cabinet and hinge hole plugs and move to opposite side. 15. Lower freezer door onto center hinge pin. 16. Close freezer door. Have an assistant lift up on opposite side of door while tightening screws to install top hinge. 17. Flip toe grille and reinstall. 18. Plug in electrical power cord and turn refrigerator temperature control to center position. Adjust setting as necessary.
-
 1
1 -
 2
2 -
 3
3 -
 4
4 -
 5
5 -
 6
6 -
 7
7 -
 8
8 -
 9
9 -
 10
10 -
 11
11 -
 12
12 -
13
-
14
-
15
-
16
-
17
-
18
-
19
-
20
-
21
 |
 |