Kenmore 7901 Use and Care Guide - Page 13
Fig. 23
 |
View all Kenmore 7901 manuals
Add to My Manuals
Save this manual to your list of manuals |
Page 13 highlights
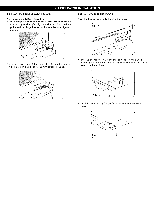
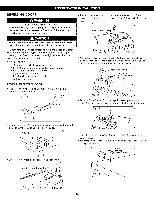
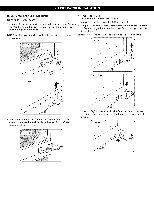
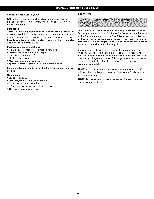
• At this point, remove the Decorative Bolt on bottom of refrigerator housing from the left side of refrJgeraton you will need this hole for the Bottom Hinge. J ° Take out the Hinge Pin insert and move the Bracket to the other side of the door, keeping the same orientation. ° Place Hinge Pin insert into the left side of the bracket. Tighten Hinge Pin Bracket to door. Hinge Pin Bracket Hinge Pin Insert Fig. 23 • Move the Bottom Hinge to the left side of housing, keeping the same oreintation, and reattach with 3 bolts. Now move Decorative Bolt to hole on lower right side of housing. ° Take Door Closer/Stop and flip. Line up screw holes and mount on left side of door bottom with the two screws. Turn door upright. It is now ready for re-attaching. NOTE: The Refrigerator Door Closer/Stop is not used on all models. The model you have may note include this part. _Fig. 24 " Turn refrigerator door upside down on a non-scratching surface. ° With door upside down, loosen the 2 screws and remove the Door Closer/Stop, the loosen the other two screws to remove the Bottom Hinge Pin Insert Bracket with Hinge Pin Insert. NOTE: The Refrigerator Door Closer/Stop is not used on all models. The model you have may not include this part. "Figo 25 _ __i Door Closer/Stop \ ° With flat-head screwdriver, carefully pry off and remove the cover over the screw holes on the left side of refrigerator housing. Fig. 29 Hinge Pin Hinge Pin Insert O Fig. 26 14
-
 1
1 -
2
-
3
-
4
-
5
-
6
-
7
-
 8
8 -
 9
9 -
 10
10 -
 11
11 -
 12
12 -
 13
13 -
 14
14 -
 15
15 -
 16
16 -
 17
17 -
 18
18 -
19
-
20
-
21
-
22
-
23
-
24
-
25
-
26
-
27
-
28
-
29
-
30
-
31
-
32
 |
 |
