Kenmore 9991 Use and Care Guide - Page 11
Controls, Temperature
 |
View all Kenmore 9991 manuals
Add to My Manuals
Save this manual to your list of manuals |
Page 11 highlights
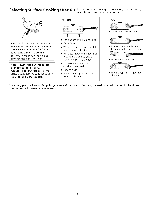
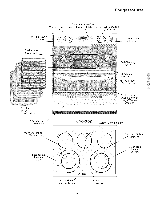
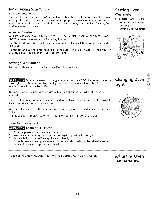
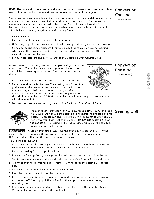
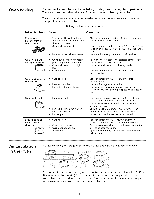
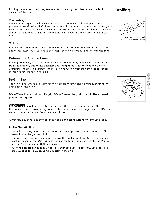
Before Setting Oven Controls Oven Vent Location The oven is vented at the rear of the cooktop. When the oven is on, warm air is released through the vents. This venting is necessary for proper air circulation in the oven and good baking results. DO NOT block the vents. Doing so may cause cooking failures, fire or damage to the appliance. Arranging Oven Racks ALWAY5 ARRANGE OVEN RACK5 WHEN THE OVEN 15 COOL (PRIOR TO OPERATING THE OVEN). Always use oven mitts when using the oven. To remove an oven rack, pull the rack forward until it stops. Lift up front of rack and slide out. To replace an oven rack, fit the rack onto the guides on the oven walls. Tilt the front of the rack upward and slide the rack back into place. Setting Oven Controls FEATURE OVERVIEW o Before Setting Oven Controls o Setting Oven Controls Setting Oven Controls For oven settings, refer to the Electronic Oven Control Guide. Be sure the oven is unplugged and all parts are COOL before replacing the oven light bulb. Do not turn the oven light on during a self-cleaning cycle. High temperature will reduce lamp life. On some modelsaninteriorovenlight opened. willturn on automatically whenthe ovenis The oven light may be turned on when the door is closed by using the oven light switch located on the Electronic Oven control. On a self-cleanning holder. oven the lamp is covered with a glass shield held in place by a wire THIS GLASS SHIELD MUST ALWAYS BE IN PLACE WHEN THE OVEN IS IN USE. Changing Light Oven To Replace the Light Bulb: BE SURE OVEN IS COOL 1. Turn the power off at the main source. 2. Wear a leather-faced glove for protection against possible broken glass. 3. Replace bulb with a 40 Watt appliance bulb only. 4. For self-cleaning oven, press wire holder to one side to release glass shield, change bulb and be sure to replace glass shield. To adjust the oven temperature, refer to the Electronic Oven Control Guide. Adjusting Oven Temperature 11
-
 1
1 -
2
-
3
-
4
-
5
-
 6
6 -
 7
7 -
 8
8 -
 9
9 -
 10
10 -
 11
11 -
 12
12 -
 13
13 -
 14
14 -
 15
15 -
 16
16 -
17
-
18
-
19
-
20
-
21
-
22
-
23
-
24
-
25
-
26
-
27
-
28
-
29
-
30
-
31
-
32
-
33
-
34
-
35
-
36
-
37
-
38
-
39
-
40
-
41
-
42
-
43
-
44
-
45
-
46
-
47
-
48
 |
 |
