Kenwood CMOS-740HD Instruction Manual - Page 5
Accessories
 |
View all Kenwood CMOS-740HD manuals
Add to My Manuals
Save this manual to your list of manuals |
Page 5 highlights
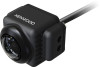
WARNING • If you connect the ignition wire (Red) to the car chassis (Ground), you may cause a short circuit, that in turn may start a fire. Always connect those wires to the power source running through the fuse box. • Do not cut out the fuse from the ignition wire (Red). The power supply must be connected to the wires via the fuse. CAUTION • If your car's ignition does not have an ACC position, connect the ignition wires to a power source that can be turned on and off with the ignition key. If you connect the ignition wire to a power source with a constant voltage supply, as with battery wires, the battery may die. • If the fuse blows, first make sure the wires aren't touching to cause a short circuit, then replace the old fuse with one with the same rating. • Insulate unconnected wires with vinyl tape or other similar material. To prevent a short circuit, do not remove the caps on the ends of the unconnected wires or the terminals. • After the unit is installed, check whether the brake lamps, blinkers, wipers, etc. on the car are working properly. • Install so that it does not obstruct the rear field of view. • Install so that it does not protrude from the side of the car. • Do not perform installation in rain or fog. • When humidity is high, dry the surface to which the unit is to be attached before installing. • Moisture on the attachment surface reduces adhesive strength, which may lead to the unit coming off. • Do not attach the camera bracket to areas on the car body treated with fluorocarbon resin, or glass. • May result in the rear view camera falling off. - Do not apply water to the unit. - Do not expose the unit to rain. - Do not subject the camera to unnecessary force. - Thoroughly clean where tape is used for sticking on the unit. • Refer to the Instruction's manual for details on connecting the other units, then make connections correctly. • Secure the wiring with cable clamps or adhesive tape. To protect the wiring, wrap adhesive tape around them where they lie against metal parts. • Route and secure all wiring so it cannot touch any moving parts, such as the gear shift, handbrake and seat rails. • Do not route wiring in places that get hot, such as near the heater outlet. If the insulation of the wiring melts or gets torn, there is a danger of the wiring short-circuiting to the vehicle body. • When replacing the fuse, be sure to use only fuse of the rating prescribed on the fuse holder. • To minimize noise locate the TV antenna cable, radio antenna cable and RCA cable as far away from each other as possible. • Lay the cords by avoiding high-temperature areas. Use corrugated tubes for wiring inside the engine room. If a cord contacts a high-temperature area of the vehicle, the coating may melt and cause shortcircuiting, which may lead to a fire or electric shock hazard. Accessories Camera (3.0 m)..........1 Power cord (6.0 m[1])..........1 1 4 Power unit..........1 Camera bracket..........1 FUSE 2A ACC Screw (M3 × 5 mm)..........2 Camera bracket clamping screw (Ø3 × 8 mm)..........1 Grommet..........1 Band..........1 [1] Including the power unit English | 5
-
 1
1 -
 2
2 -
 3
3 -
 4
4 -
 5
5 -
 6
6 -
 7
7 -
 8
8 -
 9
9 -
 10
10 -
 11
11 -
12
-
13
-
14
-
15
-
16
-
17
-
18
-
19
-
20
-
21
-
22
-
23
-
24
-
25
-
26
-
27
-
28
-
29
-
30
-
31
-
32
-
33
-
34
-
35
-
36
-
37
-
38
-
39
-
40
-
41
-
42
-
43
-
44
-
45
-
46
-
47
-
48
-
49
-
50
-
51
-
52
-
53
-
54
-
55
-
56
-
57
-
58
 |
 |
