Kenwood CMOS-740HD Instruction Manual - Page 6
Installation
 |
View all Kenwood CMOS-740HD manuals
Add to My Manuals
Save this manual to your list of manuals |
Page 6 highlights
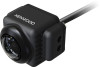
Installation Recommended Installation Position Examples of correct camera installation on the rear of the vehicle Installation position The camera has two securing holes at the side at the top and bottom. Please adjust according to the installation. Installation example Mount so that the "KENWOOD" logo appears at the top. 5 Fix the camera temporarily with tape, etc. Using a piece of tape, etc., fix the camera temporarily. 12345 OK NG Installing the Camera/Adjusting its angle 1 Decide the camera installation position. 2 Clean the camera installation surface. Using a commercially available cleaner, wipe dirt, moisture and oil away from the surface on which the camera bracket is to be attached. 3 If required, separate the camera bracket from the camera and adjust the shape according to the surface on which it will be attached. Bend Bend Adjust the camera bracket shape so that it fits the camera installation position. Camera bracket 4 Mount the camera on the camera bracket. Secure the camera to the camera bracket with the mounting screw. (2 locations on each side) Mount so that the "KENWOOD" logo appears at the top. Screw (M3 × 5 mm) Install the camera at the center of the vehicle and not to hide the number plate. And also install straight toward the forward/reverse direction of the vehicle. Be careful not to lean the camera toward other directions of the vehicle, etc. 6 Complete all of the required connections. 7 Display the camera video. Before viewing the camera, apply the parking brake and chock the wheels so that the vehicle will not move. Otherwise, an unexpected accident may result. For displaying the camera video, read the instruction manual for your video monitor. Change the shift lever to the R (Reverse) range to view the image of the rear of the vehicle. 8 Adjust the camera angle. When adjusting the camera angle, be careful not to stretch the camera cord. Adjust the angle so that the rear of the vehicle or the bumper can be seen at the bottom of the monitor. 6 | English Vehicle rear part or bumper
-
 1
1 -
 2
2 -
 3
3 -
 4
4 -
 5
5 -
 6
6 -
 7
7 -
 8
8 -
 9
9 -
 10
10 -
 11
11 -
 12
12 -
13
-
14
-
15
-
16
-
17
-
18
-
19
-
20
-
21
-
22
-
23
-
24
-
25
-
26
-
27
-
28
-
29
-
30
-
31
-
32
-
33
-
34
-
35
-
36
-
37
-
38
-
39
-
40
-
41
-
42
-
43
-
44
-
45
-
46
-
47
-
48
-
49
-
50
-
51
-
52
-
53
-
54
-
55
-
56
-
57
-
58
 |
 |
