Kenwood DPX-5000BT Operation Manual 1 - Page 9
Change the crossover type, Caution - firmware
 |
View all Kenwood DPX-5000BT manuals
Add to My Manuals
Save this manual to your list of manuals |
Page 9 highlights
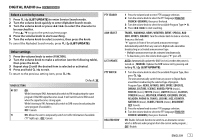
GETTING STARTED Default: XX TUNER SETTING DAB L-BAND*1 ON: Receives L-BAND ensemble during digital audio reception. ; OFF: Cancels DAB ANT POWER*1 ON: Supplies power to the DAB antenna. Selects when using the supplied antenna. ; OFF: Does not supply power. Selects when using passive antenna without booster. ( 32) PRESET TYPE NORMAL: Memorizes one station for each preset button in each band (FM1/ FM2/ FM3/ MW/ LW/ DB1/ DB2/ DB3). ; MIX: Memorizes one station (digital radio or analog radio) for each preset button, regardless of the selected band. DISPLAY EASY MENU When entering [FUNCTION]... ON: ZONE1 and ZONE2 illuminations change to white color. ; OFF: ZONE2 illumination changes to white color while ZONE1 illumination remains as [COLOR SELECT] color. ( 21) (Refer to the illustration on page 21 for zone identification.) SYSTEM KEY BEEP*2 ON: Activates the keypress tone. ; OFF: Deactivates. SOURCE SELECT BUILT-IN AUX ON: Enables AUX in source selection. ; OFF: Disables. ( 10) P-OFF WAIT Applicable only when the demonstration mode is turned off. Sets the duration when the unit will automatically turn off (while in standby mode) to save the battery. 20M: 20 minutes ; 40M: 40 minutes ; 60M: 60 minutes ; - - -: Cancels CD READ 1: Automatically distinguishes between audio file disc and music CD. ; 2: Forces to play as a music CD. No sound can be heard if an audio file disc is played. *1 For . *2 Not applicable if 3-way crossover is selected. F/W UPDATE UPDATE SYSTEM/ UPDATE DAB1/ UPDATE DAB2 F/W UP xx.xx/ YES: Starts upgrading the firmware. ; NO: Cancels (upgrading is not F/W UP xxxxx/ activated). F/W UP Vxxx For details on how to update the firmware, see: www.kenwood.com/cs/ce/ FACTORY RESET YES: Resets the settings to default (except the stored station). ; NO: Cancels. CLOCK CLOCK DISPLAY ON: The clock time is shown on the display even when the unit is turned off. ; OFF: Cancels. ENGLISH ESPANOL Select the display language for [FUNCTION] menu and music information if applicable. By default, [ENGLISH] is selected. Change the crossover type 1 Press repeatedly to enter STANDBY. 2 Press and hold number buttons 4 and 5 to enter crossover select. The current crossover type appears. 3 Turn the volume knob to select "2WAY" or "3WAY", then press the knob. 4 Turn the volume knob to select "YES" or "NO", then press the knob. The selected crossover type appears. • To cancel, press and hold . • To adjust the selected crossover settings, ( 20). Caution Select a crossover type according to how the speakers are connected. ( 31) If you select a wrong type: • The speakers may damage. • The output sound level may be extremely high or low. ENGLISH 5
-
 1
1 -
2
-
3
-
 4
4 -
 5
5 -
 6
6 -
 7
7 -
 8
8 -
 9
9 -
 10
10 -
 11
11 -
 12
12 -
 13
13 -
 14
14 -
15
-
16
-
17
-
18
-
19
-
20
-
21
-
22
-
23
-
24
-
25
-
26
-
27
-
28
-
29
-
30
-
31
-
32
-
33
-
34
-
35
-
36
-
37
-
38
-
39
-
40
-
41
-
42
-
43
-
44
-
45
-
46
-
47
-
48
-
49
-
50
-
51
-
52
-
53
-
54
-
55
-
56
-
57
-
58
-
59
-
60
-
61
-
62
-
63
-
64
-
65
-
66
-
67
-
68
-
69
-
70
-
71
-
72
-
73
-
74
-
75
-
76
-
77
-
78
-
79
-
80
-
81
-
82
-
83
-
84
-
85
-
86
-
87
-
88
-
89
-
90
-
91
-
92
-
93
-
94
-
95
-
96
-
97
-
98
-
99
-
100
-
101
-
102
-
103
-
104
-
105
-
106
-
107
-
108
-
109
-
110
-
111
-
112
-
113
-
114
-
115
-
116
-
117
-
118
-
119
-
120
-
121
-
122
-
123
-
124
-
125
-
126
-
127
-
128
-
129
-
130
-
131
-
132
-
133
-
134
-
135
-
136
-
137
-
138
-
139
-
140
-
141
-
142
-
143
-
144
 |
 |
