Kenwood K-8302 Operation Manual - Page 5
Getting Started
 |
View all Kenwood K-8302 manuals
Add to My Manuals
Save this manual to your list of manuals |
Page 5 highlights
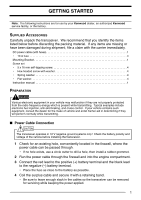
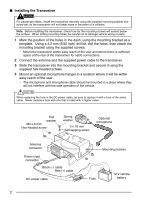
GETTING STARTED Note: The following instructions are for use by your Kenwood dealer, an authorized Kenwood service facility, or the factory. SUPPLIED ACCESSORIES Carefully unpack the transceiver. We recommend that you identify the items listed below before discarding the packing material. If any items are missing or have been damaged during shipment, file a claim with the carrier immediately. DC power cable (with fuses 1 • 10 A fuse 4 Mounting Bracket 1 Screw set • 5 x 16 mm self-tapping screw 4 • Hex-headed screw with washer 4 • Spring washer 4 • Flat washer 4 Instruction manual 1 PREPARATION Various electronic equipment in your vehicle may malfunction if they are not properly protected from the radio frequency energy which is present while transmitting. Typical examples include electronic fuel injection, anti-skid braking, and cruise control. If your vehicle contains such equipment, consult the dealer for the make of vehicle and enlist his/her aid in determining if they will perform normally while transmitting. ■ Power Cable Connection The transceiver operates in 12 V negative ground systems only! Check the battery polarity and voltage of the vehicle before installing the transceiver. 1 Check for an existing hole, conveniently located in the firewall, where the power cable can be passed through. • If no hole exists, use a circle cutter to drill a hole, then install a rubber grommet. 2 Run the power cable through the firewall and into the engine compartment. 3 Connect the red lead to the positive (+) battery terminal and the black lead to the negative (-) battery terminal. • Place the fuse as close to the battery as possible. 4 Coil the surplus cable and secure it with a retaining band. • Be sure to leave enough slack in the cables so the transceiver can be removed for servicing while keeping the power applied. 1
-
 1
1 -
 2
2 -
 3
3 -
 4
4 -
 5
5 -
 6
6 -
 7
7 -
 8
8 -
 9
9 -
 10
10 -
 11
11 -
12
-
13
-
14
-
15
-
16
-
17
-
18
-
19
-
20
-
21
-
22
-
23
-
24
-
25
-
26
-
27
-
28
-
29
-
30
-
31
-
32
 |
 |
