Kenwood KRC-259R User Manual - Page 22
Removing Faceplate, Reattaching Faceplate, Switching settings, Turning Disabled System Indicator On/
 |
View all Kenwood KRC-259R manuals
Add to My Manuals
Save this manual to your list of manuals |
Page 22 highlights
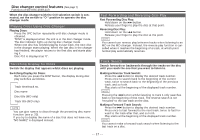
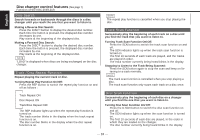
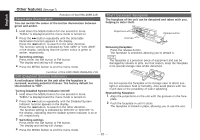
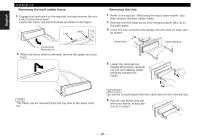
Other features (See page 7) English Selectable Illumination Function of the KRC-259R,21R 7 You can switch the colour of the button illumination between green and amber. 1 Hold down the MENU button for one second or more. "MENU" is displayed and the menu mode is turned on. 2 Press the ¢ button repeatedly until the Selectable Illumination function appears in the display. Press the 4 button to search in the other direction. The function setting is indicated by "COL GRN" or "COL AMB" in the display, indicating that the current colour is green or amber, respectively. 3 Switching settings Press either the AM button or FM button. The display and setting will change. 4 Press the MENU button to end the menu mode. Theft Deterrent Faceplate The faceplate of the unit can be detached and taken with you, helping to deter theft. Projections Grooves Release button Removing Faceplate: Press the release button. The faceplate is unlocked, allowing you to detach it. NOTE • The faceplate is a precision piece of equipment and can be damaged by shocks or jolts. For that reason, keep the faceplate in its special storage case whilst detached. Function of the KRC-259R,159RA/RG,21R DSI (Disabled System Indicator) A red indicator blinks on the unit after the faceplate is removed, warning potential thieves. The factory default for this function is "ON". Turning Disabled System Indicator On/Off: 1 Hold down the MENU button for one second or more. "MENU" is displayed and the menu mode is turned on. 2 Press the ¢ button repeatedly until the Disabled System Indicator function appears in the display. Press the 4 button to search in the other direction.. The function setting is indicated by "DSI ON" or "DSI OFF" in the display, indicating that the disable system indicator is on or off, respectively. • Do not expose the faceplate or its storage case to direct sunlight or excessive heat or humidity. Also avoid places with too much dust or the possibility of water splashing. Reattaching Faceplate: 1 Align the projections on the unit with the grooves on the face- plate. 2 Push the faceplate in until it clicks. The faceplate is locked in place, allowing you to use the unit. 3 Switching settings Press either the AM button or FM button. The display and setting will change. 4 Press the MENU button to end the menu mode. - 22 -
-
 1
1 -
2
-
3
-
4
-
5
-
6
-
7
-
8
-
9
-
10
-
11
-
12
-
13
-
14
-
15
-
16
-
 17
17 -
 18
18 -
 19
19 -
 20
20 -
 21
21 -
 22
22 -
 23
23 -
 24
24 -
 25
25 -
 26
26 -
 27
27 -
28
-
29
-
30
 |
 |
