Kenwood XD-551 User Manual - Page 18
Operation of remote control unit
 |
View all Kenwood XD-551 manuals
Add to My Manuals
Save this manual to your list of manuals |
Page 18 highlights
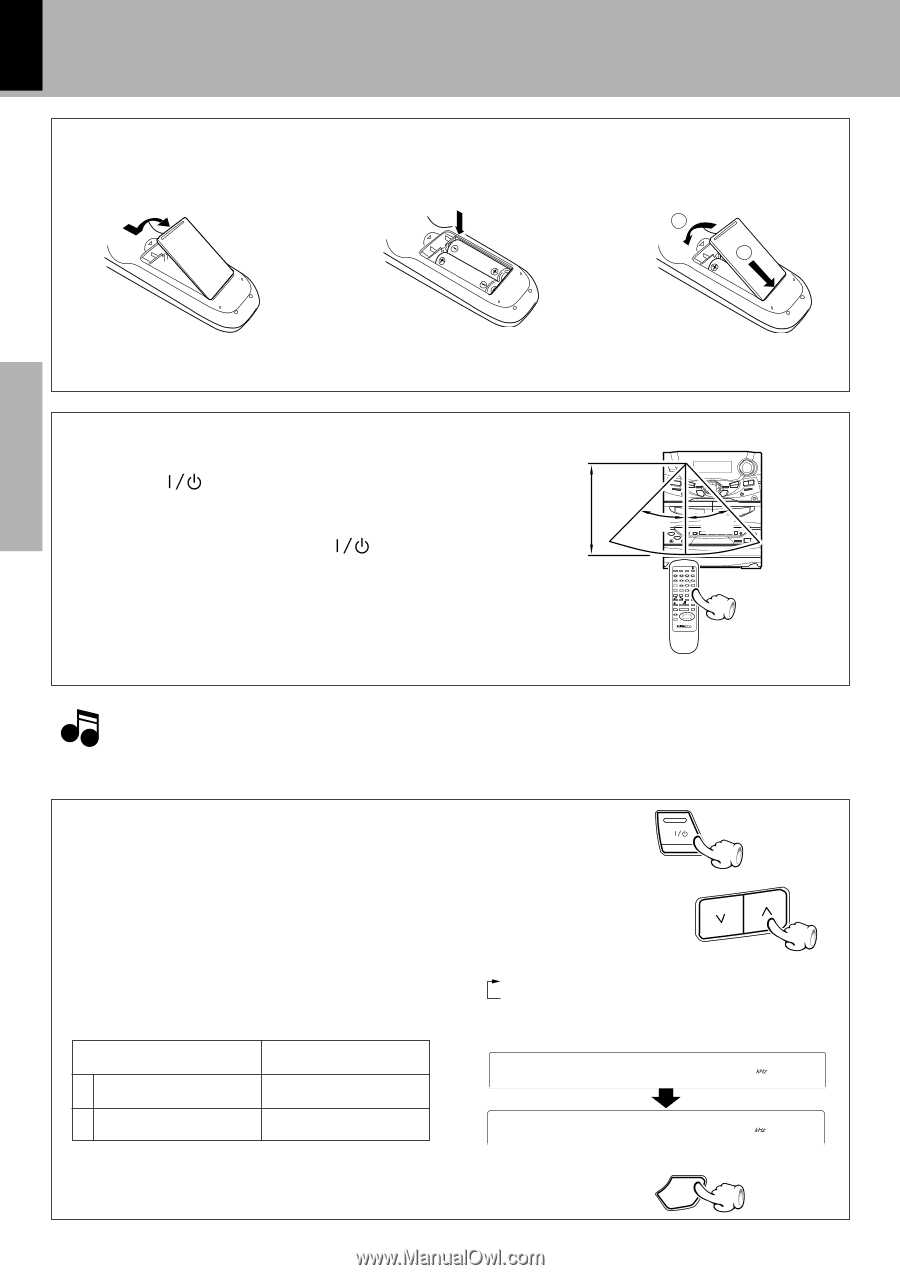
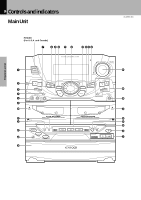
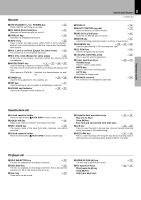
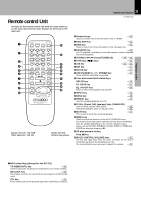
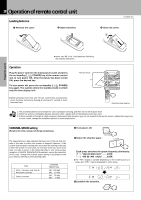
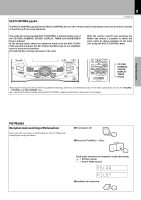
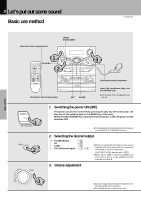
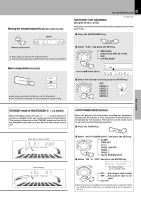
18 Operation of remote control unit Loading batteries 1 Remove the cover. 2 Insert batteries. XD-SERIES (En) 3 Close the cover. 2 1 Preparation section Basic section ÷ Insert two R6 ("AA"-size) batteries following the polarity indications. Operation Plug the power cord into the mains power outlet and press the on/standby ( POWER) key of the remote control unit to turn power ON. After the power has been turned ON, press the desired key. To turn power off, press the on/standby ( POWER) key again. The system enters the standby mode in which only the time display is lit. ÷ When pressing more than one remote control keys successively, press the keys securely by leaving an interval of 1 second or more between keys. Remote sensor 6m ˚ 30 ˚ 30 Operating range (approx.) Notes 1. The provided batteries are intended for use in operation checking, and their service life may be short. 2. When the remote controllable distance becomes short, replace both of the batteries with new ones. 3. If direct sunlight or the light of a high- frequency fluorescent lamp (inverter type, etc.) is incident to the remote sensor, malfunction may occur. In such a case, change the installation position to avoid malfunction. CHANNEL SPACE setting (Except for the U.S.A., Canada, U.K. Europe and Australia) The space between radio channels has been set to the one that prevails in the area to which the system is shipped. However, if the current channel space setting does not match the setting in the area where the system is to be used, for instance when you move from area 1 or area 2 shown in the following table or vice versa, proper reception of AM/FM (SW/MW/FM) broadcasts cannot be expected. In this case, change the channel space setting in accordance with your area by referring to the following table. Area 1 USA, Canada and South American countries 2 Other countries CHANNEL SPACE freq. FM : 100 kHz AM : 10 kHz FM : 50 kHz AM : 9 kHz 1 Turn power off. ON/STANDBY 2 Select the channel space. TUNING Each press switches the space frequency alternately. 1 "FM100/AM10 kHz" ....... STEP, 2 "FM 50 /AM 9 kHz" ....... STEP, ÷ The "AM" display is variable depending on the model (country or area), and "MW" may be displayed in some areas. FM100/AM 10 FM 50/AM 9 3 Establish the selection. ENTER Application section Knowledge sections
-
 1
1 -
2
-
3
-
4
-
5
-
6
-
7
-
8
-
9
-
10
-
11
-
12
-
 13
13 -
 14
14 -
 15
15 -
 16
16 -
 17
17 -
 18
18 -
 19
19 -
 20
20 -
 21
21 -
 22
22 -
 23
23 -
24
-
25
-
26
-
27
-
28
-
29
-
30
-
31
-
32
-
33
-
34
-
35
-
36
-
37
-
38
-
39
-
40
-
41
-
42
-
43
-
44
-
45
-
46
-
47
-
48
-
49
-
50
-
51
-
52
-
53
-
54
-
55
-
56
-
57
-
58
-
59
-
60
-
61
-
62
-
63
-
64
 |
 |