KitchenAid KBSN708MPA Owners Manual - Page 26
Water Dispenser, Dispenser, Dispenser Tray on some models, To Dispense Water, Notes, Cut Hazard
 |
View all KitchenAid KBSN708MPA manuals
Add to My Manuals
Save this manual to your list of manuals |
Page 26 highlights
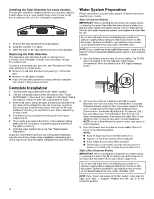
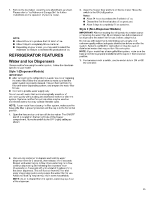
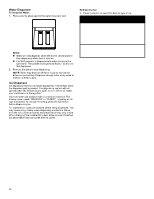
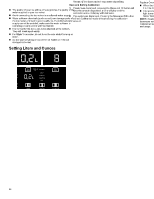
Water Dispenser To Dispense Water: 1. Press a sturdy glass against the water dispenser pad. To Dispense Ice: 1. Press the button to select the desired type of ice. WARNING Notes: � Water will only dispense when left door is closed and will stop dispensing when door is opened. � It is NOT possible to dispense both water and ice at the same time. The paddle that is pressed first will be the one that dispenses. 2. Remove the glass to stop dispensing. NOTE: Water may have an off-flavor if you do not use the dispenser periodically. Dispense enough water every week to maintain a fresh supply. Ice Dispenser Ice dispenses from the ice maker storage bin in the freezer when the dispenser pad is pressed. The dispensing system will not operate when the freezer door is open. To turn off the ice maker, see "Ice Maker and Storage Bin." Your ice maker can produce both crushed and cubed ice. The display screen reads "CRUSHED" or "CUBED," indicating which type is selected. To change the setting, press the ICE button before dispensing ice. For crushed ice, cubes are crushed before being dispensed. This may cause a slight delay when dispensing crushed ice. Noise from the ice crusher is normal, and pieces of ice may vary in size. When changing from crushed to cubed, a few ounces of crushed ice will be dispensed along with the first cubes. Cut Hazard Use a sturdy glass when dispensing ice. Failure to do so can result in cuts. 2. Press a sturdy glass against the ice dispenser pad. Hold the glass close to the dispenser opening so ice does not fall outside of the glass. IMPORTANT: You do not need to apply a lot of pressure to the pad in order to activate the ice dispenser. Pressing hard will not make the ice dispense faster or in greater quantities. 3. Remove the glass to stop dispensing. NOTE: Ice may continue to dispense for up to 10 seconds after removing the glass from the pad. The dispenser may continue to make noise for a few seconds after dispensing. Dispenser Tray (on some models) Some models have a tray at the bottom of the dispenser area. The tray is designed to catch small spills and is removable for easy emptying and cleaning. NOTE: There is no drain in the tray. 26
-
 1
1 -
2
-
3
-
4
-
5
-
6
-
7
-
8
-
9
-
10
-
11
-
12
-
13
-
14
-
15
-
16
-
17
-
18
-
19
-
20
-
 21
21 -
 22
22 -
 23
23 -
 24
24 -
 25
25 -
 26
26 -
 27
27 -
 28
28 -
 29
29 -
 30
30 -
 31
31 -
32
-
33
-
34
-
35
-
36
-
37
-
38
-
39
-
40
-
41
-
42
-
43
-
44
-
45
-
46
-
47
-
48
-
49
-
50
-
51
-
52
-
53
-
54
-
55
-
56
-
57
-
58
-
59
-
60
-
61
-
62
-
63
-
64
-
65
-
66
-
67
-
68
-
69
-
70
-
71
-
72
 |
 |
