KitchenAid KCM1209DG Owners Manual - Page 7
Using The Coffee Maker
 |
View all KitchenAid KCM1209DG manuals
Add to My Manuals
Save this manual to your list of manuals |
Page 7 highlights
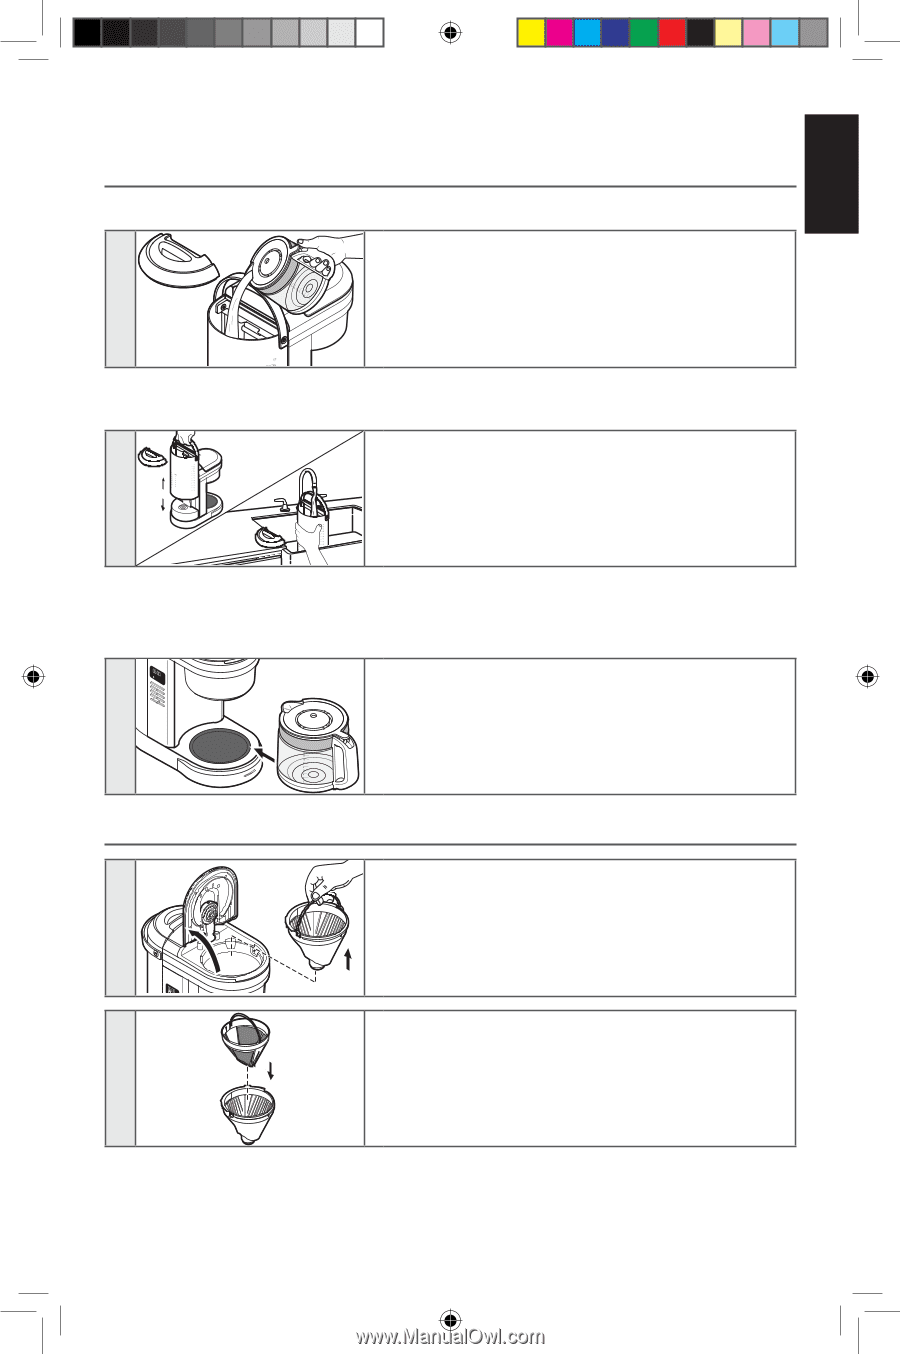
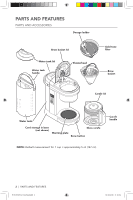
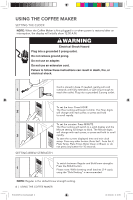
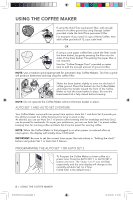
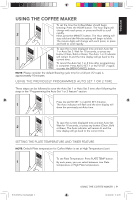
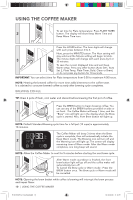
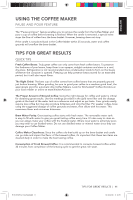
ENGLISH USING THE COFFEE MAKER FILLING THE COFFEE MAKER WITH WATER FOR BREWING TIP: Brew 2 pots of fresh, cool water and discard before brewing the first pot of coffee. Remove the water tank lid and pour with enough fresh, 1 cool water to make the desired amount of coffee. Use the level markings on the water tank window. Close the water tank lid properly. OR Remove the water tank lid and then lift the water tank up gently using handle. Pour enough fresh, cool water 1 to make the desired amount of coffee. Place the water tank back in position. Use the alignment feature on the water tank to make sure the water tank is properly in place. IMPORTANT: Make sure to fill the water tank with only the amount of water needed to brew your desired number of cups. If you put in 12 cups of water, the Coffee Maker will brew all 12 cups. 2 AM Auto SetB1rew/Cancel Hour Auto Set 2 Plate Temp Bold Minute Plate Timer Clean Brew/Cancel Place the Carafe in the Coffee Maker. Make sure the lid is securely in position and bottom of the carafe is fully seated; otherwise, the Pause and pour feature may not engage, causing water and coffee to overflow the brew basket. ASSEMBLY AND USAGE OF BREW BASKET 1 Raise the brew basket lid and remove the brew basket. Auto AM 12PM x 2 Insert the Gold Tone permanent filter or cone paper filter into the brew basket. TIP: The coffee filter can also be inserted and coffee grounds added with or without removing the brew basket from the Coffee Maker. IMPORTANT: Do not use both types of filters at the same time. Using both filters might cause water and coffee to overflow the brew basket. USING THE COFFEE MAKER | 7 W11299037A_V2_Final.indb 7 18/10/2018 11:10:36
-
 1
1 -
 2
2 -
 3
3 -
 4
4 -
 5
5 -
 6
6 -
 7
7 -
 8
8 -
 9
9 -
 10
10 -
 11
11 -
 12
12 -
13
-
14
-
15
-
16
-
17
-
18
-
19
-
20
-
21
-
22
-
23
-
24
-
25
-
26
-
27
-
28
-
29
-
30
-
31
-
32
-
33
-
34
-
35
-
36
-
37
-
38
-
39
-
40
-
41
-
42
-
43
-
44
-
45
-
46
-
47
-
48
 |
 |