KitchenAid KDRS462VSS Installation Guide - Page 18
Initial Lighting and Gas Flame Adjustments, Check Operation of Cooktop Burners, If burners do
 |
UPC - 883049155692
View all KitchenAid KDRS462VSS manuals
Add to My Manuals
Save this manual to your list of manuals |
Page 18 highlights
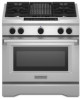
Initial Lighting and Gas Flame Adjustments Cooktop burners use electronic igniters in place of standing pilots. When the cooktop control knob is turned to any position, the system creates a spark to light the burner. This sparking continues until the flame is lit or the knob is turned to Off. Check Operation of Cooktop Burners Push in and turn each control knob to the "LITE" position. The surface burners and grill flames should light within 4 seconds. The first time a burner is lit, it may take longer than 4 seconds to light because of air in the gas line. After verifying the proper burner operation, turn the control knobs to OFF. If burners do not light properly: ■ Turn cooktop control knob to the "OFF" position. ■ Check that the range is plugged in and the circuit breaker has not tripped or the fuse has not blown. ■ Check that the gas shutoff valves are set to the "open" position. ■ Check that burner caps are properly positioned on burner bases. Repeat start-up. If a burner does not light at this point, contact your dealer or authorized service company for assistance. Flame Height The cooktop flame should be a steady blue flame approximately ¼" (0.64 cm) high. Dual Flame Burner A B 4. Open the oven door and remove the 2 screws on each side of the range that hold the control console in place. NOTE: Make sure to leave oven door open or the control console will not rest in the side brackets properly once it is detached. 5. Pull up on the control console and let it drop forward into the notched console brackets on each side. A A. Control console bracket 6. Remove the round gasket from the valve stem. 7. Put a control knob onto the valve stem of the burner you want to adjust. A. Upper flame B. Lower (simmer) flame Single Flame Burner To Adjust Flame Height: 1. Unplug range or disconnect power. 2. Remove burner grates. 3. Remove the control knobs. 8. Turn the control knob to LO and using a butane extension lighter, light the burner. 9. Remove the control knob. 18
-
 1
1 -
2
-
3
-
4
-
5
-
6
-
7
-
8
-
9
-
10
-
11
-
12
-
 13
13 -
 14
14 -
 15
15 -
 16
16 -
 17
17 -
 18
18 -
 19
19 -
 20
20 -
 21
21 -
 22
22 -
 23
23 -
24
-
25
-
26
-
27
-
28
-
29
-
30
-
31
-
32
-
33
-
34
-
35
-
36
-
37
-
38
-
39
-
40
-
41
-
42
-
43
-
44
-
45
-
46
-
47
-
48
-
49
-
50
-
51
-
52
-
53
-
54
-
55
-
56
 |
 |
