KitchenAid KDTE204GPS Use & Care Guide - Page 11
Dishwasher Features
 |
View all KitchenAid KDTE204GPS manuals
Add to My Manuals
Save this manual to your list of manuals |
Page 11 highlights
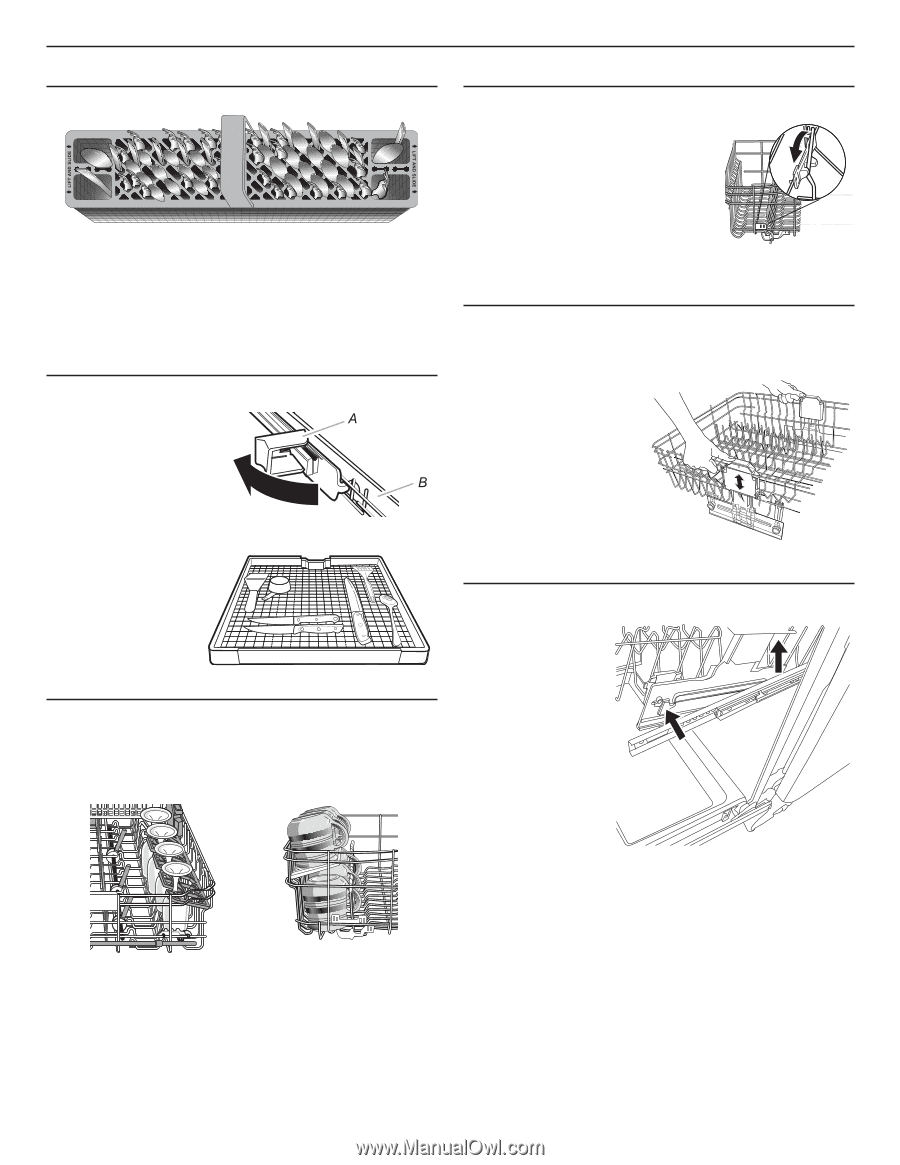
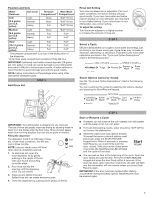
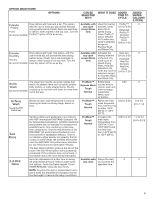
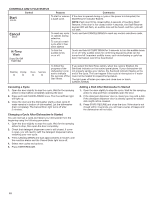
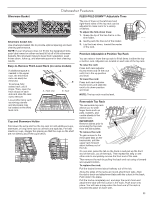
Dishwasher Features Silverware Basket Silverware basket lids: Use silverware basket lids to provide optimal spacing and best cleaning performance. NOTE: If your silverware does not fit into the designated slots, push tabs inward on either end and lift lid off of the silverware baskets. Mix silverware types to keep them separated. Load knives down, forks up, and alternate spoons for best cleaning results. Easy-to-Remove Third-Level Rack (on some models) If additional space is needed in the upper rack, the third-level rack can easily be removed. To remove, fully extend rack until it stops. Then, open the track stops on each side and slide the rack out to remove. Low-profile items such as serving utensils and silverware may be loaded on the third level rack. A. Track stop B. Track Cup and Stemware Holder Fold down the extra shelf on the top rack to hold additional cups, stemware, or long items such as utensils and spatulas. For best results on cups, stagger the spacing so that the cups on the shelf are not directly above the cups below. FLEXI-FOLD DOWN™ Adjustable Tines The row of tines on the left-hand and right-hand sides of the top rack can be adjusted to make room for a variety of dishes. To adjust the fold-down tines: 1. Grasp the tip of the tine that is in the tine holder. 2. Gently push the tine out of the holder. 3. Lay the tines down, toward the center of the rack. Premium Adjustable 2-Position Top Rack You can raise or lower the top rack to fit tall items in either the top or bottom rack. Adjusters are located on each side of the top rack. To raise the rack: Press both rack adjuster thumb levers and lift the rack until it is in the up position and level. To lower the rack: Press both rack adjuster thumb levers and slide the rack to its down position and level. NOTE: The top rack must be level. Removable Top Rack The removable top rack allows you to wash larger items such as pots, roasters, and cookie sheets in the bottom rack. IMPORTANT: Remove dishes prior to removing the top rack from the dishwasher. To remove the rack: To gain access to the removable tabs on the tracks/rails, pull the upper rack forward about halfway out of the tub. On one side, press the tab on the track in and pull up the front end of the rack, out of the track. Then repeat this step on the other side to completely remove the front end of the rack. Then remove the rack by pulling the back end out using a forward and upward motion. To replace the rack: Pull the tracks forward about halfway out of the tub. Along the sides of the racks are round attachment tabs. Align the rack's back end attachment tabs with the cutout in the track. Push down into place. Pull the tracks completely out, and align the rack's front end attachment tabs with the cutout in the track. Push down into place. You will hear a snap when the front end of the rack is secured into place on each side. 11
-
 1
1 -
2
-
3
-
4
-
5
-
 6
6 -
 7
7 -
 8
8 -
 9
9 -
 10
10 -
 11
11 -
 12
12 -
 13
13 -
 14
14 -
 15
15 -
 16
16 -
17
-
18
-
19
-
20
-
21
-
22
-
23
-
24
-
25
-
26
-
27
-
28
-
29
-
30
-
31
-
32
-
33
-
34
-
35
-
36
-
37
-
38
-
39
-
40
-
41
-
42
-
43
-
44
-
45
-
46
-
47
-
48
-
49
-
50
-
51
-
52
-
53
-
54
-
55
-
56
 |
 |