KitchenAid KES6504SX Owners Manual - Page 20
Reassembling The Milk Frother, Attachment, Troubleshooting Guide
 |
View all KitchenAid KES6504SX manuals
Add to My Manuals
Save this manual to your list of manuals |
Page 20 highlights
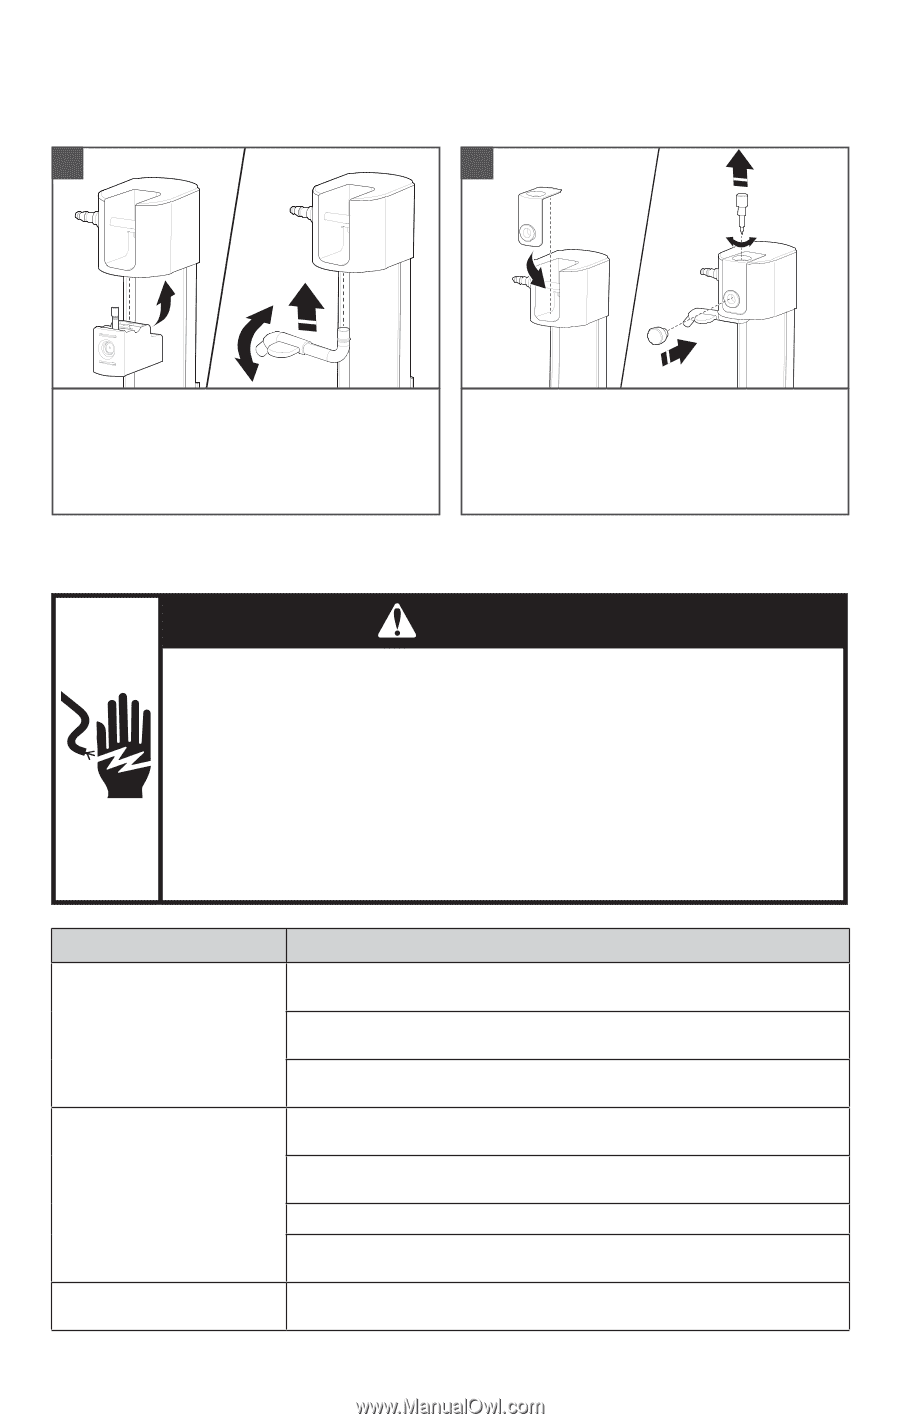
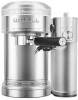
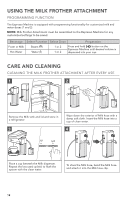
REASSEMBLING THE MILK FROTHER ATTACHMENT 1 2 Follow the steps of disassembly to assemble again. Press the Black rubber frother component into the main housing. Insert the Milk dispenser tube in place and push upward and rotate until it clicks. Replace the Decorative plate. Insert and rotate the Froth level adjustment knob in its place. Replace the Function knob in its place. TROUBLESHOOTING GUIDE WARNING Electrical Shock Hazard Plug into a grounded 3 prong outlet. Do not remove ground prong. Do not use an adapter. Do not use an extension cord. Failure to follow these instructions can result in death, fire, or electrical shock. Problem Espresso Machine will not start Solution Check if the Espresso Machine is securely plugged into a grounded 3 prong outlet. Check to see if the Main power On/Off switch is turned on. If you have a circuit breaker box, then make sure the circuit is closed. Coffee is ground too finely. Use slightly coarser grind. Espresso flows slowly or only drips All Mode/Dose lights are blinking Coffee tamped too hard. Use slightly lighter tamp between 30-40 lb or 15-20 kg of force. Filter basket can be blocked. Use a pin to unblock the hole(s). Machine might need to be descaled. Refer to the "Descaling the Espresso Machine" section. Machine is in protection mode to avoid the pump from over heating. Turn Off the machine for 7.5 minutes. 20
-
 1
1 -
2
-
3
-
4
-
5
-
6
-
7
-
8
-
9
-
10
-
11
-
12
-
13
-
14
-
 15
15 -
 16
16 -
 17
17 -
 18
18 -
 19
19 -
 20
20 -
 21
21 -
 22
22 -
 23
23 -
 24
24 -
 25
25 -
26
-
27
-
28
-
29
-
30
-
31
-
32
-
33
-
34
-
35
-
36
-
37
-
38
-
39
-
40
-
41
-
42
-
43
-
44
-
45
-
46
-
47
-
48
-
49
-
50
-
51
-
52
-
53
-
54
-
55
-
56
-
57
-
58
-
59
-
60
-
61
-
62
-
63
-
64
-
65
-
66
-
67
-
68
-
69
-
70
-
71
-
72
-
73
-
74
-
75
-
76
-
77
-
78
-
79
-
80
 |
 |