KitchenAid KP26M1XDP Use & Care Guide - Page 56
Bread Making Tips
 |
UPC - 050946970219
View all KitchenAid KP26M1XDP manuals
Add to My Manuals
Save this manual to your list of manuals |
Page 56 highlights
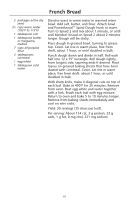
Bread Making Tips Making bread with a mixer is quite different from making bread by hand. Therefore, it will take some practice before you are completely comfortable with the new process. For your convenience, we offer these tips to help you become accustomed to bread making the KitchenAid® brand way. • Start out with an easy recipe, such as the "Basic White Bread" recipe, until you are familiar with using the PowerKnead™ Spiral Dough Hook. • Always use the PowerKnead™ Spiral Dough Hook to mix and knead yeast doughs. • Use Speed 2 to mix or knead yeast doughs. Use of any other speed creates high potential for stand mixer failure. • Do not use recipes calling for more than 14 cups all-purpose flour or 8 cups whole-wheat flour when making dough with a 6 qt mixer. • Do not use recipes calling for more than 12 cups all-purpose flour or 6 cups whole-wheat flour when making dough with a 5 qt mixer. • Use a candy or other kitchen thermometer to assure that liquids are at temperature specified in the recipe. Liquids at higher temperature can kill yeast, while liquids at lower temperatures will retard yeast growth. • Warm all ingredients to room temperature to ensure proper rising of dough. If yeast is to be dissolved in bowl, always warm bowl first by rinsing with warm water to avoid cooling of liquids. • Allow bread to rise in a warm place, 80°F to 85°F, free from draft, unless otherwise specified in recipe. • Here are some alternative rising methods to use: (1) The bowl containing the dough can be placed on a wire rack over a pan of hot water. (2) The bowl can be placed on the top rack of an unheated oven; put a pan of hot water on the rack below. (3) Turn the oven to 400°F for 1 minute; then turn it off; place the bowl on the center rack of the oven and close the door. Cover bowl with waxed paper, if desired. Always cover with towel to retain warmth in the bowl and protect the dough from drafts. • Recipe rising times may vary due to temperature and humidity in your kitchen. Dough has doubled in bulk when indentation remains after tips of fingers are pressed lightly and quickly into dough. • Most bread recipes give a range for the amount of flour to be used. Enough flour has been added when the dough starts to clean sides of bowl. If dough is sticky or humidity is high, slowly add more flour, about 1⁄2 cup at a time but do not exceed recommended flour capacity. Knead after each addition until flour is completely worked into dough. If too much flour is added, a dry loaf will result. • When done, yeast breads and rolls should be deep golden brown in color. Other tests for doneness of breads are: Bread pulls away from the sides of pan, and tapping on the top of the loaf produces a hollow sound. Turn loaves and rolls onto racks immediately after baking to avoid sogginess. 56
-
 1
1 -
2
-
3
-
4
-
5
-
6
-
7
-
8
-
9
-
10
-
11
-
12
-
13
-
14
-
15
-
16
-
17
-
18
-
19
-
20
-
21
-
22
-
23
-
24
-
25
-
26
-
27
-
28
-
29
-
30
-
31
-
32
-
33
-
34
-
35
-
36
-
37
-
38
-
39
-
40
-
41
-
42
-
43
-
44
-
45
-
46
-
47
-
48
-
49
-
50
-
 51
51 -
 52
52 -
 53
53 -
 54
54 -
 55
55 -
 56
56 -
 57
57 -
 58
58 -
 59
59 -
 60
60 -
 61
61 -
62
-
63
-
64
-
65
-
66
-
67
-
68
-
69
-
70
-
71
-
72
-
73
-
74
-
75
-
76
-
77
-
78
-
79
-
80
-
81
-
82
-
83
-
84
-
85
-
86
-
87
-
88
 |
 |