KitchenAid KUDE60HXSS Installation Guide - Page 14
Install the Door Handle, on some models, Custom Panel Dimensions - control panel
 |
UPC - 883049209944
View all KitchenAid KUDE60HXSS manuals
Add to My Manuals
Save this manual to your list of manuals |
Page 14 highlights
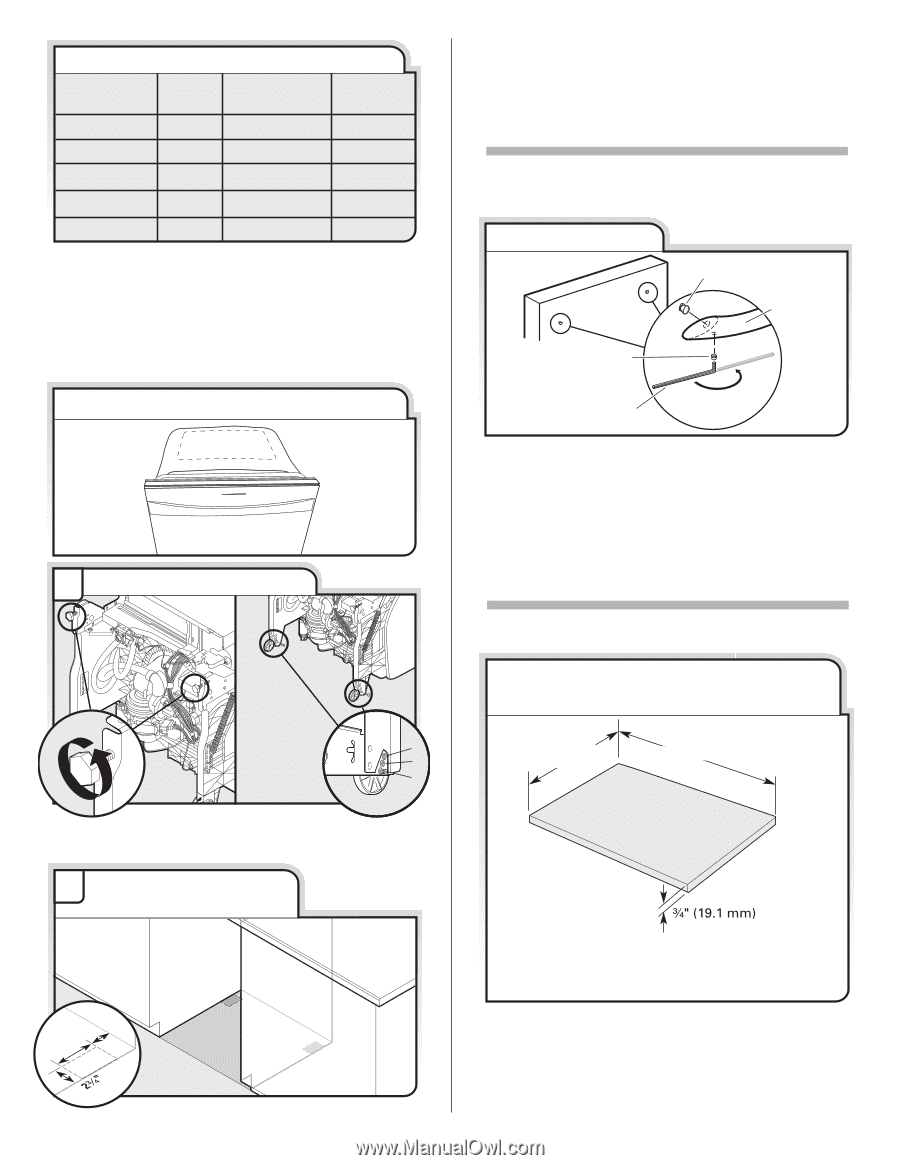
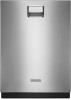
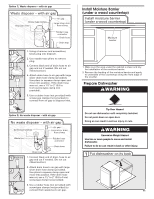
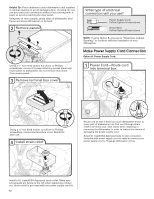
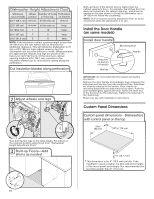
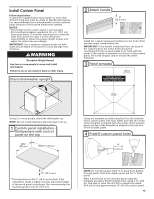
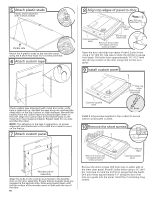
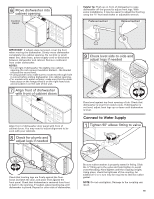
Dishwasher Height Adjustment Chart Minimum Wheel Number of turns Perforation cutout height position on front leg on blanket 33³⁄₄" (85.7 cm) remove all the way up remove 33⁷⁄₈" (86 cm) remove all the way up keep 34" (86.4 cm) 1 10 keep 34¹⁄₄" (87 cm) 2 5 keep 34¹⁄₂" (87.6 cm) 3 0 keep NOTE: If the minimum cabinet opening height is less than 34" (86.4 cm), the rear wheels can be removed for additional clearance. This will allow the dishwasher to fit into a 33⁷⁄₈" (86 cm) high cabinet opening, but the dishwasher will be more difficult to move. (Measurements are approximate. Wheels and legs are preset at the factory for 34¹⁄₂" [87.6 cm].) If the minimum cabinet opening height is 33³⁄₄" (85.7 cm), a section in the insulation blanket can be removed by cutting along the perforation. Cut insulation blanket along perforation 2 Adjust wheels and legs 1 2 3 Wheel Turn both leveler legs to the same height. Put wheels in the required position determined from "Dishwasher Height Adjustment Chart." 3 Built-up Floors-Add shims as needed (140."1 cm) (52c"m) (7 cm) 14 Built-up floors: If the kitchen floor is higher than the cabinet opening's floor - for example, the kitchen floor tile does not extend into the cabinet opening - add shims as needed in the area shown to bring the dishwasher up to 34" (86.4 cm) below the countertop. NOTE: Shims must be securely attached to floor to avoid movement when the dishwasher is in use. Install the Door Handle (on some models) Install door handle Mounting stud Handle Setscrew (in bottom of handle) Hex key IMPORTANT: Do not scratch the front panel during this procedure. Remove the door handle and hardware bag containing the setscrews and hex key from the cardboard box. Setscrews are already installed in the handle. Place handle on mounting studs with the setscrews facing down. Push the door handle tightly against the door. Insert the short end of the hex key into the setscrews. Tighten the setscrews ¹⁄₄ turn past snug. Retain hex key with Installation Instructions. Custom Panel Dimensions Custom panel dimensions-Dishwashers with control panel on the top 23⁵⁄₈" (60 cm) *29 76 cm) * This dimension is for 4" (10.2 cm) toe kick. If the installation needs a higher toe kick, adjust the height of the wood panel accordingly. Not recommended for toe kicks greater than 6" (15.2 cm).
-
 1
1 -
2
-
3
-
4
-
5
-
6
-
7
-
8
-
 9
9 -
 10
10 -
 11
11 -
 12
12 -
 13
13 -
 14
14 -
 15
15 -
 16
16 -
 17
17 -
 18
18 -
 19
19 -
20
-
21
-
22
-
23
-
24
-
25
-
26
-
27
-
28
-
29
-
30
-
31
-
32
-
33
-
34
-
35
-
36
-
37
-
38
-
39
-
40
-
41
-
42
-
43
-
44
-
45
-
46
-
47
-
48
-
49
-
50
-
51
-
52
 |
 |