KitchenAid KUDE60HXSS Installation Guide - Page 23
Complete Installation, Bottom Sound Pad Installation, on some models
 |
UPC - 883049209944
View all KitchenAid KUDE60HXSS manuals
Add to My Manuals
Save this manual to your list of manuals |
Page 23 highlights
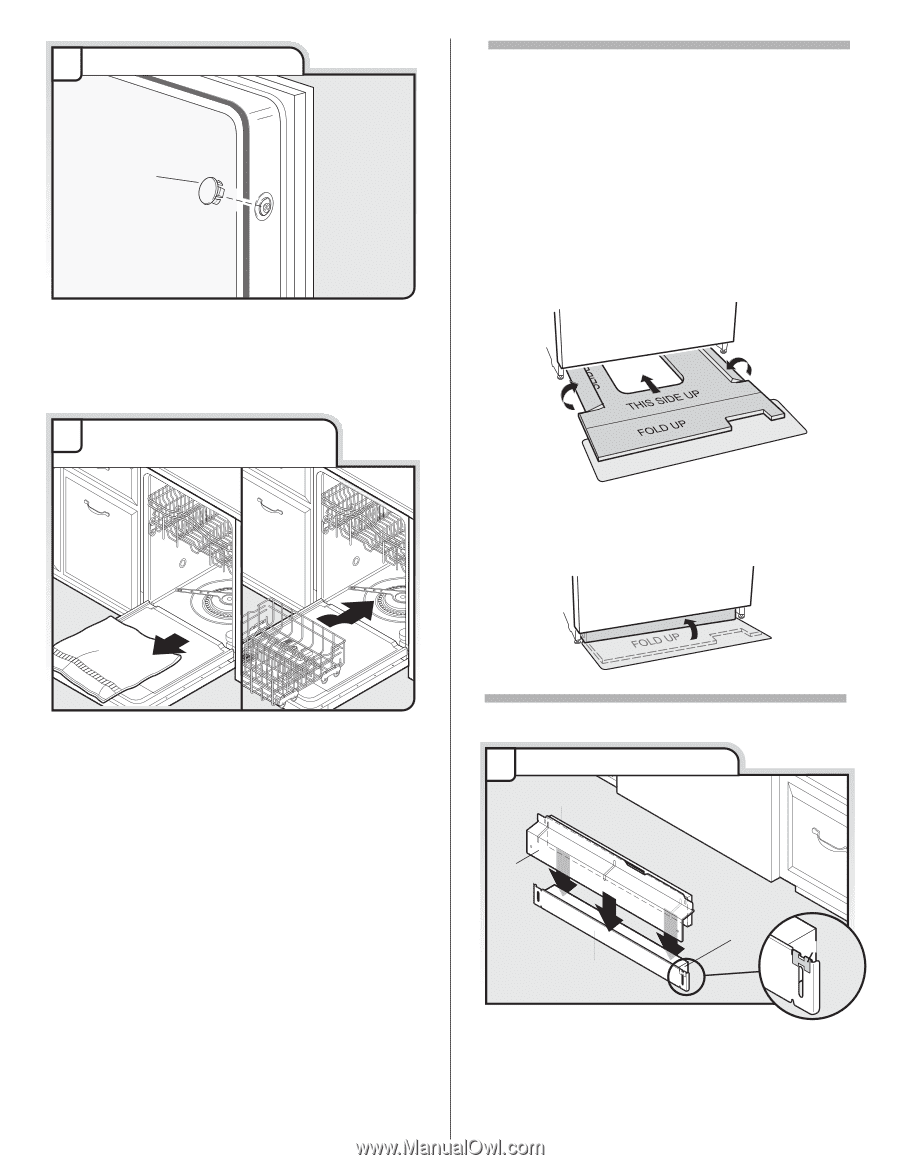
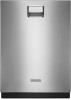
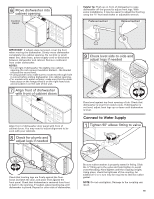
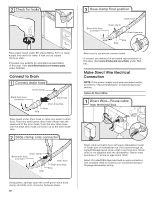
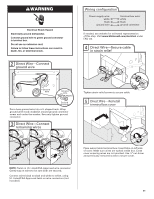
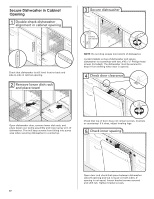
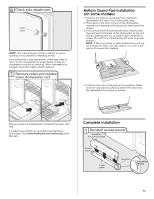
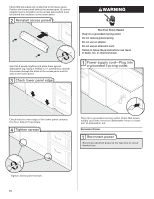
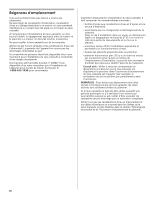
6 Check side attachment plastic button NOTE: You must drill pilot holes in cabinet to avoid splitting the wood before installing screws. If securing with a side attachment, check that sides of door do not rub against the screw heads. If they do, dishwasher must be re-centered. When dishwasher is properly centered, replace plastic buttons. 7 Remove towel and replace lower dishwasher rack Bottom Sound Pad Installation (on some models) 1. Remove the bottom sound pad from inside the dishwasher and take it out of the plastic bag. 2. Place pad on the floor in front of the dishwasher, making sure lettering is facing up and vinyl pad faces down. 3. Fold up and hold the side panels down. Slowly slide the pad toward the back of the dishwasher as far as it will go, making sure not to push or pull any wires or hoses. (Do not force.) Side panels will open to proper position. NOTE: If there are pipes or other obstructions coming up through the floor, you will need to cut a slit in the pad to fit around the obstacle. 4. Fold the front end of the pad up into position. Make sure the vinyl pad is tucked up behind the door and the dishwasher front legs, as shown. Remove towel from dishwasher. Reinstall the lower dish rack. If needed, see website for animated representation of this step. Visit www.kitchenaid.com/anchoring under FAQ tab. Complete Installation 1 Reinstall access panels Insulation (on some models) Access panel Lower panel Insulation Grounding clip 23
-
 1
1 -
2
-
3
-
4
-
5
-
6
-
7
-
8
-
9
-
10
-
11
-
12
-
13
-
14
-
15
-
16
-
17
-
 18
18 -
 19
19 -
 20
20 -
 21
21 -
 22
22 -
 23
23 -
 24
24 -
 25
25 -
 26
26 -
 27
27 -
 28
28 -
29
-
30
-
31
-
32
-
33
-
34
-
35
-
36
-
37
-
38
-
39
-
40
-
41
-
42
-
43
-
44
-
45
-
46
-
47
-
48
-
49
-
50
-
51
-
52
 |
 |