Kodak Photo Printer 300 User's Guide - Page 14
Printing from a PictBridge compatible camera - review
 |
View all Kodak Photo Printer 300 manuals
Add to My Manuals
Save this manual to your list of manuals |
Page 14 highlights
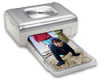
2 Printing from a PictBridge compatible camera The Kodak EasyShare photo printer 300 offers PictBridge compatibility, which lets you print from your Kodak EasyShare digital camera or any PictBridge compatible camera or device. 1 Take pictures with your camera (see your camera user's guide). 2 Connect your PictBridge compatible camera to the photo printer using the USB cable for your camera. Plug one end of the cable into the camera and the other into the USB device connector located on the side of the photo printer. NOTE: If the PictBridge compatible camera is already plugged in but the connection is no longer available, disconnect then reconnect the USB cable to re-establish the connection. 3 Use your digital camera to review pictures, choose printing options, and print. See your camera user's guide for details. The On/Off button blinks while printing. The paper cycles four times during the printing process before the finished print is ejected. The first three passes apply layers of yellow, magenta, and cyan colors to the print, and the fourth pass applies the Kodak XtraLifeTM coating that protects and preserves the image. IMPORTANT: Wait until printing is complete before removing paper, the paper tray, or the camera. Failure to do so can cause paper misfeeds or jams. 8 www.kodak.com/go/support
-
 1
1 -
2
-
3
-
4
-
5
-
6
-
7
-
8
-
 9
9 -
 10
10 -
 11
11 -
 12
12 -
 13
13 -
 14
14 -
 15
15 -
 16
16 -
 17
17 -
 18
18 -
 19
19 -
20
-
21
-
22
-
23
-
24
-
25
-
26
-
27
-
28
-
29
-
30
-
31
-
32
-
33
-
34
-
35
-
36
-
37
-
38
-
39
-
40
-
41
-
42
-
43
-
44
-
45
-
46
 |
 |
