Konica Minolta Kodak Ngenuity 9090DC User Guide - Page 83
Additional print head cleaning, Spit pad replacement
 |
View all Konica Minolta Kodak Ngenuity 9090DC manuals
Add to My Manuals
Save this manual to your list of manuals |
Page 83 highlights
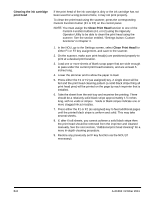
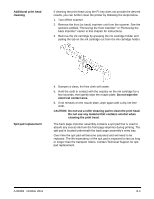
Additional print head cleaning If cleaning the print head using the F1 key does not provide the desired results, you can further clean the printer by following the steps below. 1. Turn off the scanner. 2. Remove the front (or back) imprinter unit from the scanner. See the sections entitled, "Removing the front imprinter" or "Removing the back imprinter" earlier in this chapter for instructions. 3. Remove the ink cartridge by grasping the ink cartridge holder and pulling the tab on the ink cartridge out from the ink cartridge holder. Spit pad replacement 4. Dampen a clean, lint-free cloth with water. 5. Hold the cloth in contact with the nozzles on the ink cartridge for a few seconds, then gently wipe the nozzle plate. Do not wipe the electrical contact area. 6. If ink remains on the nozzle plate, wipe again with a dry, lint-free cloth. CAUTION: Do not use a roller cleaning pad to clean the print head. Do not use any material that contains alcohol when cleaning the print head. The back page imprinter assembly contains a spit pad that is used to absorb any excess ink from the front page imprinter during printing. The spit pad is located underneath the back page assembly's entry tray. Over time the spit pad will become saturated and will need to be replaced. The life expectancy of the spit pad is expected to last as long or longer than the transport rollers. Contact Technical Support for spit pad replacement. A-61662 October 2011 B-9
-
 1
1 -
2
-
3
-
4
-
5
-
6
-
7
-
8
-
9
-
10
-
11
-
12
-
13
-
14
-
15
-
16
-
17
-
18
-
19
-
20
-
21
-
22
-
23
-
24
-
25
-
26
-
27
-
28
-
29
-
30
-
31
-
32
-
33
-
34
-
35
-
36
-
37
-
38
-
39
-
40
-
41
-
42
-
43
-
44
-
45
-
46
-
47
-
48
-
49
-
50
-
51
-
52
-
53
-
54
-
55
-
56
-
57
-
58
-
59
-
60
-
61
-
62
-
63
-
64
-
65
-
66
-
67
-
68
-
69
-
70
-
71
-
72
-
73
-
74
-
75
-
76
-
77
-
 78
78 -
 79
79 -
 80
80 -
 81
81 -
 82
82 -
 83
83 -
 84
84 -
 85
85 -
 86
86 -
 87
87 -
 88
88 -
89
-
90
-
91
-
92
-
93
-
94
-
95
-
96
-
97
-
98
 |
 |
