Konica Minolta Kodak i1440 User Guide - Page 10
Installation, Installing the scanner
 |
View all Konica Minolta Kodak i1440 manuals
Add to My Manuals
Save this manual to your list of manuals |
Page 10 highlights
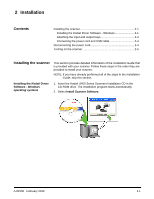
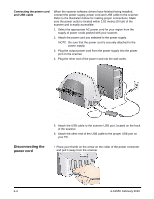
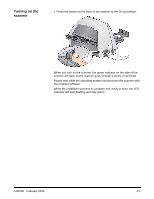
2 Installation Contents Installing the scanner 2-1 Installing the Kodak Driver Software - Windows 2-1 Attaching the input and output trays 2-3 Connecting the power cord and USB cable 2-4 Disconnecting the power cord 2-4 Turning on the scanner 2-5 Installing the scanner This section provides detailed information of the Installation Guide that is provided with your scanner. Follow these steps in the order they are provided to install your scanner. NOTE: If you have already performed all of the steps in the Installation Guide, skip this section. Installing the Kodak Driver Software - Windows operating systems 1. Insert the Kodak i1400 Series Scanners Installation CD in the CD-ROM drive. The installation program starts automatically. 2. Select Install Scanner Software. A-61550 February 2010 2-1
-
 1
1 -
2
-
3
-
4
-
 5
5 -
 6
6 -
 7
7 -
 8
8 -
 9
9 -
 10
10 -
 11
11 -
 12
12 -
 13
13 -
 14
14 -
 15
15 -
16
-
17
-
18
-
19
-
20
-
21
-
22
-
23
-
24
-
25
-
26
-
27
-
28
-
29
-
30
-
31
-
32
-
33
-
34
-
35
-
36
-
37
-
38
-
39
-
40
-
41
-
42
-
43
-
44
-
45
-
46
-
47
-
48
-
49
-
50
-
51
-
52
-
53
-
54
-
55
-
56
-
57
-
58
-
59
 |
 |
