Konica Minolta ProJet 3510 HD Cube3 User Guide - Page 33
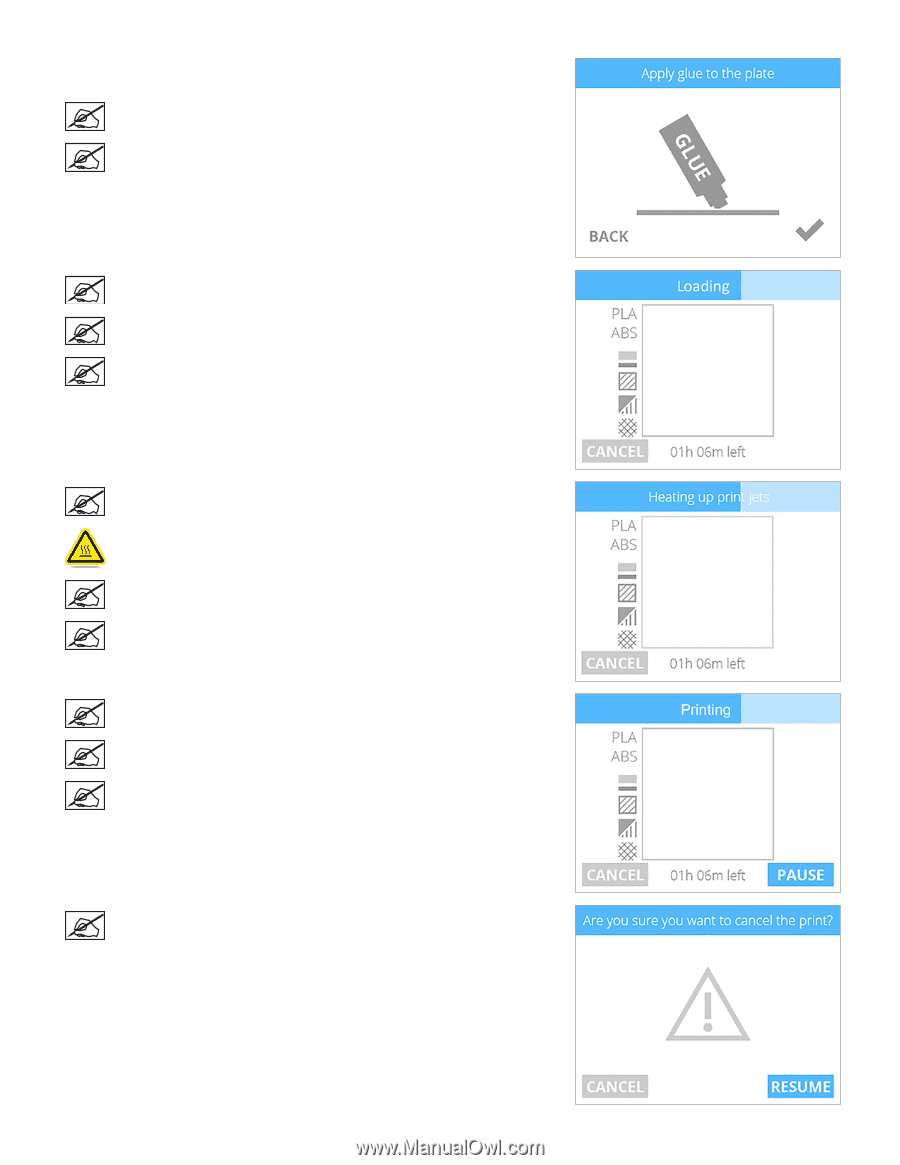
checkmark, PAUSE, CANCEL, RESUME
 |
View all Konica Minolta ProJet 3510 HD manuals
Add to My Manuals
Save this manual to your list of manuals |
Page 33 highlights
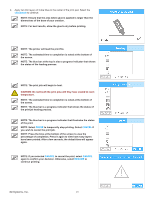
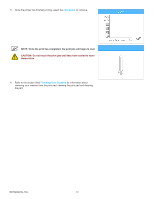
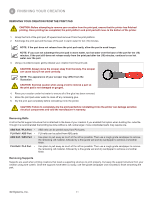
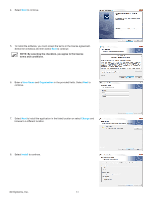
4. Apply two thin layers of Cube Glue to the center of the print pad. Select the checkmark to continue. NOTE: Ensure that the area where glue is applied is larger than the dimensions of the base of your creation. NOTE: For best results, allow the glue to dry before printing. NOTE: The printer will load the print file. NOTE: The estimated time to completion is noted at the bottom of the screen. NOTE: The blue bar at the top is also a progress indicator that shows the status of the loading process. NOTE: The print jets will begin to heat. CAUTION: Do not touch the print jets until they have cooled to room temperature. NOTE: The estimated time to completion is noted at the bottom of the screen. NOTE: The blue bar is a progress indicator that shows the status of the print jet heating process. NOTE: The blue bar is a progress indicator that illustrates the status of the print. NOTE: Select PAUSE to temporarily stop printing. Select CANCEL if you wish to cancel the print job. NOTE: Press the time at the bottom of the screen to view the percentage of completion. Press it again to view how many layers have been printed. After a few seconds, the default time will appear again. NOTE: If you selected CANCEL to cancel the print, select CANCEL again to confirm your decision. Otherwise, select RESUME to continue printing. 3D Systems, Inc. 29
-
 1
1 -
2
-
3
-
4
-
5
-
6
-
7
-
8
-
9
-
10
-
11
-
12
-
13
-
14
-
15
-
16
-
17
-
18
-
19
-
20
-
21
-
22
-
23
-
24
-
25
-
26
-
27
-
 28
28 -
 29
29 -
 30
30 -
 31
31 -
 32
32 -
 33
33 -
 34
34 -
 35
35 -
 36
36 -
 37
37 -
 38
38 -
39
-
40
-
41
-
42
-
43
-
44
-
45
-
46
-
47
-
48
-
49
-
50
-
51
-
52
-
53
-
54
-
55
-
56
-
57
-
58
-
59
-
60
-
61
-
62
-
63
-
64
-
65
-
66
-
67
-
68
-
69
-
70
-
71
-
72
-
73
-
74
-
75
-
76
-
77
-
78
-
79
-
80
-
81
-
82
-
83
-
84
-
85
-
86
-
87
-
88
-
89
-
90
-
91
-
92
-
93
-
94
-
95
-
96
-
97
-
98
-
99
-
100
-
101
-
102
 |
 |