Konica Minolta bizhub 421 bizhub 361/421/501 Fax Driver Operations User Manual - Page 30
Uninstalling the fax driver
 |
View all Konica Minolta bizhub 421 manuals
Add to My Manuals
Save this manual to your list of manuals |
Page 30 highlights
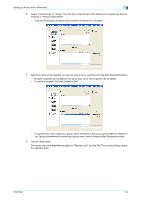
Installing the fax driver 2 2.5 2.5.1 Uninstalling the fax driver If it becomes necessary to delete the fax driver, for example, when you want to reinstall the fax driver, follow the procedure below to delete the driver. Uninstallation by an uninstallation program If the fax driver was installed with an installer, the delete function of the fax driver is included. 1 Click the [Start] button, point to "All Programs" (or "Programs"), then to "xxxxx ", and then click "xxxxx "-"Uninstall Printer Driver". 2 Select the components to be deleted, and then click the [Uninstall] button. Follow the on-screen instructions. 2.5.2 2.5.3 3 If the restart dialog box appears, click [OK] to restart the computer. Uninstallation by an installer If the fax driver was installed with an installer, it can be deleted by the installer. 1 Insert the printer driver CD-ROM into the CD-ROM drive of the computer. - Check that the installer starts up, and then continue with step 2. - If the installer does not start up, open the printer driver folder on the CD-ROM and double-click "Setup.exe" for the 32bit editions OS and "Setup64.exe" for the 64bit editions OS, and then proceed to Step 3. 2 Click "Printer Install". The installer of the printer driver starts. 3 Click the [Agree] button on the installation license agreement screen. 4 In the setup selection dialog box, select "Uninstall Printer Driver", and then click the [Next] button. 5 Select the components to be deleted, and then click the [Delete] button. - Follow the on-screen instructions. 6 If the restart screen appears, click the [OK] button to restart the computer. Manual uninstallation If the fax driver was not installed with an installer, the delete function of the fax driver is not included. 1 Open the Printers window (for Windows XP/Server 2003, Printers and Faxes window). - For Windows 7/Server 2008 R2, Open the "Devices and Printers" window. 2 Select the icon of the printer that you want to delete. 3 Press the [Delete] key on the computer keyboard to delete the fax driver. Fax Driver 2-19
-
 1
1 -
2
-
3
-
4
-
5
-
6
-
7
-
8
-
9
-
10
-
11
-
12
-
13
-
14
-
15
-
16
-
17
-
18
-
19
-
20
-
21
-
22
-
23
-
24
-
 25
25 -
 26
26 -
 27
27 -
 28
28 -
 29
29 -
 30
30 -
 31
31 -
 32
32 -
 33
33 -
 34
34 -
 35
35 -
36
-
37
-
38
-
39
-
40
-
41
-
42
-
43
-
44
-
45
-
46
-
47
-
48
-
49
-
50
-
51
-
52
-
53
-
54
-
55
-
56
-
57
-
58
-
59
-
60
-
61
-
62
-
63
-
64
-
65
-
66
-
67
 |
 |
