Konica Minolta bizhub PRESS C7000/C7000P IC-306 Procedure to upgrade to Versio - Page 2
Reassemble the Fiery PRO
 |
View all Konica Minolta bizhub PRESS C7000/C7000P manuals
Add to My Manuals
Save this manual to your list of manuals |
Page 2 highlights
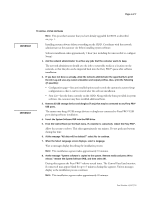
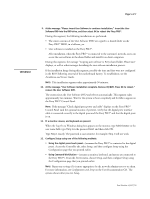
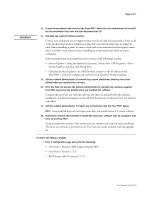
Page 2 of 7 TO INSTALL THE DIMMS 1. Shut down and then open the Fiery PRO80 (see the Installation and Service Guide). To access the DIMM sockets on the motherboard, you must remove the left panel. 2. Locate the two 1GB DIMMs provided in this upgrade kit. 3. Install the DIMMs in the two empty DIMM sockets on the motherboard (DIMM1 and DIMM3). Close the levers at each side of the socket to lock the DIMM into place. NOTE: The socket is keyed so that the DIMM fits only one way. (See the notches in the following figure.) Make sure that the entire length of the DIMM (ends and center) is fully seated in the socket and that the levers close securely around the ends of the DIMM. Lever Lever DIMM Socket notch DIMM notch 4. Clear the CMOS as follows: NOTE: You must clear the CMOS after installing a new DIMM to ensure compatibility between the new component and the previous settings stored in the BIOS. Make sure that the power cable is removed from the power outlet before clearing the CMOS. • Remove the battery from the motherboard. Carefully push the clip away from the battery until the socket ejects the battery. Then slide the battery out of its socket. Clip Battery Socket • Wait two minutes to allow the motherboard electrical components to fully discharge. • Reinstall the battery by sliding it into the socket so that the positive (+) side of the battery faces up. Press the battery down into the socket until it snaps securely into place. 5. Reassemble the Fiery PRO80 and verify its functionality (see "Restoring and verifying functionality after service" in the Installation and Service Guide). Part Number: 45097576 7
-
 1
1 -
 2
2 -
 3
3 -
 4
4 -
 5
5 -
 6
6 -
 7
7
 |
 |
