Konica Minolta magicolor 4690MF magicolor 4690 Facsimile User Guide - Page 11
Scan to SMB, or Scan to USB Mem, Select, Error, Part Name, Description - smb error
 |
View all Konica Minolta magicolor 4690MF manuals
Add to My Manuals
Save this manual to your list of manuals |
Page 11 highlights
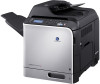
No. Part Name 7 */) keys 8 Select key 9 Error indicator 10 Back key 11 Keypad 12 Fax key LED 13 Scan key LED Description Moves left and right through menus, options, or choices. For details, refer to "Specifying Settings in Utility Menu" on page 31. Press to select the setting that is currently displayed. For details, refer to "Specifying Settings in Utility Menu" on page 31. Indicates an error condition. For details, refer to "Error Messages on the Message Window" on page 89. Clears the specified number of copies and entered text. Press to return to the previous screen. Press to cancel the setting that is currently displayed. For details, refer to "Specifying Settings in Utility Menu" on page 31 and "Entering Text" on page 94. Enters desired number of copies. Enters fax numbers, E-mail addresses, and names of recipients. For details on dialing a destination, refer to "Specifying a Recipient" on page 41. For details on entering text, refer to "Entering Text" on page 94. Enters Fax mode. Lights up in green to indicate that the machine is in Fax mode. For details, refer to "Fax Mode Screen" on page 7. Enters Scan mode (Scan to E-mail, Scan to FTP, Scan to SMB, Scan to PC, or Scan to USB Memory). Lights up in green to indicate that the machine is in Scan mode. For details, refer to the Printer/Copier/Scanner User's Guide on the Documentation CD/DVD. About the Control Panel 5
-
 1
1 -
2
-
3
-
4
-
5
-
 6
6 -
 7
7 -
 8
8 -
 9
9 -
 10
10 -
 11
11 -
 12
12 -
 13
13 -
 14
14 -
 15
15 -
 16
16 -
17
-
18
-
19
-
20
-
21
-
22
-
23
-
24
-
25
-
26
-
27
-
28
-
29
-
30
-
31
-
32
-
33
-
34
-
35
-
36
-
37
-
38
-
39
-
40
-
41
-
42
-
43
-
44
-
45
-
46
-
47
-
48
-
49
-
50
-
51
-
52
-
53
-
54
-
55
-
56
-
57
-
58
-
59
-
60
-
61
-
62
-
63
-
64
-
65
-
66
-
67
-
68
-
69
-
70
-
71
-
72
-
73
-
74
-
75
-
76
-
77
-
78
-
79
-
80
-
81
-
82
-
83
-
84
-
85
-
86
-
87
-
88
-
89
-
90
-
91
-
92
-
93
-
94
-
95
-
96
-
97
-
98
-
99
-
100
-
101
-
102
-
103
-
104
-
105
-
106
-
107
-
108
 |
 |
