Kyocera FS-C5300DN FS-C5100DN/C5200DN/C5300DN/C5400DN Printer Driver User Guid - Page 51
Adjusting Color, Set as Default Profile
 |
UPC - 632983010303
View all Kyocera FS-C5300DN manuals
Add to My Manuals
Save this manual to your list of manuals |
Page 51 highlights
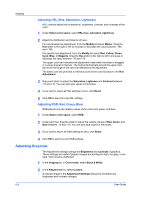
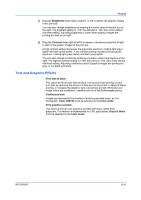
Imaging 2 Right-click on the desired color printer. 3 Select Properties. 4 Select the Color Management tab. 5 Click Color Management to open the Color Management dialog box. 6 Select the Devices tab. 7 In the Devices list, select the desired color printer. 8 Select Use my settings for this device. 9 In the Profile selection list, select Manual. 10 Click Add, to open the Associate Color Profile dialog box. 11 Select an ICC profile, or click Browse to find a profile, and click OK. The profile is added to the Profiles associated with this device list. 12 Select the desired color profile and click Set as Default Profile. 13 Click Close. Adjusting Color Color Adjustment enables you to customize the two color spaces in the driver and save up to three custom groups. Color space changes can be made to red, green, blue (RGB) levels or to hue, saturation and lightness (HSL). 1 In Color mode, select Color (CMYK). 2 In the Imaging tab, in the Adjustment list, select Custom 1, Custom 2, or Custom 3, if you have already defined color settings. If you have not defined color settings, select Edit to open the Adjustment Settings dialog box. 3 From the Custom Color Adjustment list, select Custom 1, Custom 2, or Custom 3. 4 To open the Custom Color Adjustment dialog box, click Settings. 5 Select HSL (hue, saturation, lightness) or RGB (red, green, blue) to work with as the color space. 6 Click the arrow buttons beneath the photograph to select one of three different images. Different colors are emphasized in each of the photographs to aid in the color adjustment process. KX DRIVER 6-8
-
 1
1 -
2
-
3
-
4
-
5
-
6
-
7
-
8
-
9
-
10
-
11
-
12
-
13
-
14
-
15
-
16
-
17
-
18
-
19
-
20
-
21
-
22
-
23
-
24
-
25
-
26
-
27
-
28
-
29
-
30
-
31
-
32
-
33
-
34
-
35
-
36
-
37
-
38
-
39
-
40
-
41
-
42
-
43
-
44
-
45
-
 46
46 -
 47
47 -
 48
48 -
 49
49 -
 50
50 -
 51
51 -
 52
52 -
 53
53 -
 54
54 -
 55
55 -
 56
56 -
57
-
58
-
59
-
60
-
61
-
62
-
63
-
64
-
65
-
66
-
67
-
68
-
69
-
70
-
71
-
72
-
73
-
74
-
75
-
76
-
77
-
78
-
79
-
80
-
81
-
82
-
83
-
84
-
85
-
86
-
87
-
88
-
89
 |
 |