Kyocera TASKalfa 5002i Kyocera Net Viewer Operation Guide Rev 5.5 2016.6 - Page 26
Administrator Login, Address Book, Adding Contacts
 |
View all Kyocera TASKalfa 5002i manuals
Add to My Manuals
Save this manual to your list of manuals |
Page 26 highlights
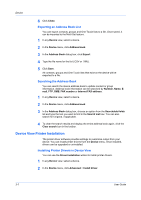
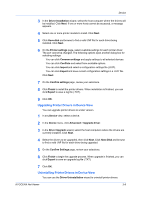
Device Administrator Login For some models, administrator authentication is required to access selected features in the Device and Account menus. Available features vary by model. When you select the feature from a menu, you are prompted to type one of the following in the Administrator Login dialog box: Command Center password Administrator login and Administrator password (with optional Use local authentication) Accounting administrator code Operations on multiple devices do not prompt for the administrator login. Login options must be configured in the Login section of the Communication Settings dialog box. Address Book The Address Book is a list of individuals and their contact information that is stored on the device. Each entry for an individual is called a contact, and contacts can be organized into groups. This contact and group information is stored on the device, and is used for faxing and scanning operations. Note: If authentication is set, accessing the address book requires the correct Login username and Password in the Communication Settings for the device. If authentication is not set, the login dialog box may appear, depending on your model. The information that can be stored for each contact includes: Number Name (and furigana, if applicable) Cover page (recipient, company, department). This information is transmitted on a Network FAX. E-mail FTP (File Transfer Protocol) SMB (Server Message Block) FAX Internet FAX You can create One Touch keys to let you access address book entries by pressing one key on the device's operation panel. Adding Contacts You can add individuals to the address book stored on a device. 1 In any Device view, select a device. 2 In the Device menu, click Address book. 3 In the Address Book dialog box, click Add contact. 4 In the Contact Settings dialog box, type the name of the contact in the Name text box. (If applicable, type the furigana in the Furigana text box.) 3-3 User Guide
-
 1
1 -
2
-
3
-
4
-
5
-
6
-
7
-
8
-
9
-
10
-
11
-
12
-
13
-
14
-
15
-
16
-
17
-
18
-
19
-
20
-
 21
21 -
 22
22 -
 23
23 -
 24
24 -
 25
25 -
 26
26 -
 27
27 -
 28
28 -
 29
29 -
 30
30 -
 31
31 -
32
-
33
-
34
-
35
-
36
-
37
-
38
-
39
-
40
-
41
-
42
-
43
-
44
-
45
-
46
-
47
-
48
-
49
-
50
-
51
-
52
-
53
-
54
-
55
-
56
-
57
-
58
-
59
-
60
-
61
-
62
-
63
-
64
-
65
-
66
-
67
-
68
-
69
-
70
-
71
-
72
-
73
-
74
-
75
-
76
-
77
-
78
-
79
-
80
-
81
-
82
-
83
-
84
-
85
-
86
-
87
-
88
-
89
-
90
-
91
-
92
-
93
-
94
-
95
-
96
-
97
-
98
-
99
 |
 |
