Kyocera TASKalfa 620 Printing System (W) Operation Guide (Setup Edition) - Page 10
Set-up, Connecting the printer cable
 |
View all Kyocera TASKalfa 620 manuals
Add to My Manuals
Save this manual to your list of manuals |
Page 10 highlights
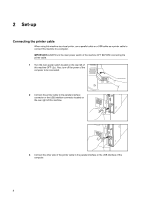
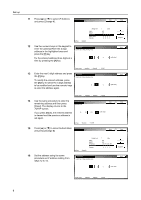
2 Set-up Connecting the printer cable When using this machine as a local printer, use a parallel cable or a USB cable as a printer cable to connect this machine to a computer. IMPORTANT:ALWAYS turn the main power switch of the machine OFF BEFORE connecting the printer cable. 1 Turn the main power switch located on the rear left of this machine OFF ( ). Also, turn off the power of the computer to be connected. 2 Connect the printer cable to the parallel interface connector or the USB interface connector located on the rear right of this machine. 3 Connect the other side of the printer cable to the parallel interface or the USB interface of the computer. 4
-
 1
1 -
2
-
3
-
4
-
 5
5 -
 6
6 -
 7
7 -
 8
8 -
 9
9 -
 10
10 -
 11
11 -
 12
12 -
 13
13 -
 14
14 -
 15
15 -
16
-
17
-
18
-
19
-
20
 |
 |

4
2
Set-up
Connecting the printer cable
When using this machine as a local printer, use a parallel cable or a USB cable as a printer cable to
connect this machine to a computer.
IMPORTANT:
ALWAYS turn the main power switch of the machine OFF BEFORE connecting the
printer cable.
1
Turn the main power switch located on the rear left of
this machine OFF (
). Also, turn off the power of the
computer to be connected.
2
Connect the printer cable to the parallel interface
connector or the USB interface connector located on
the rear right of this machine.
3
Connect the other side of the printer cable to the parallel interface or the USB interface of the
computer.