LG GCC-4520B Owners Manual - Page 13
Connecting, the Interface, Connector, the Sound, Replacing the, Computer, Cover
 |
View all LG GCC-4520B manuals
Add to My Manuals
Save this manual to your list of manuals |
Page 13 highlights
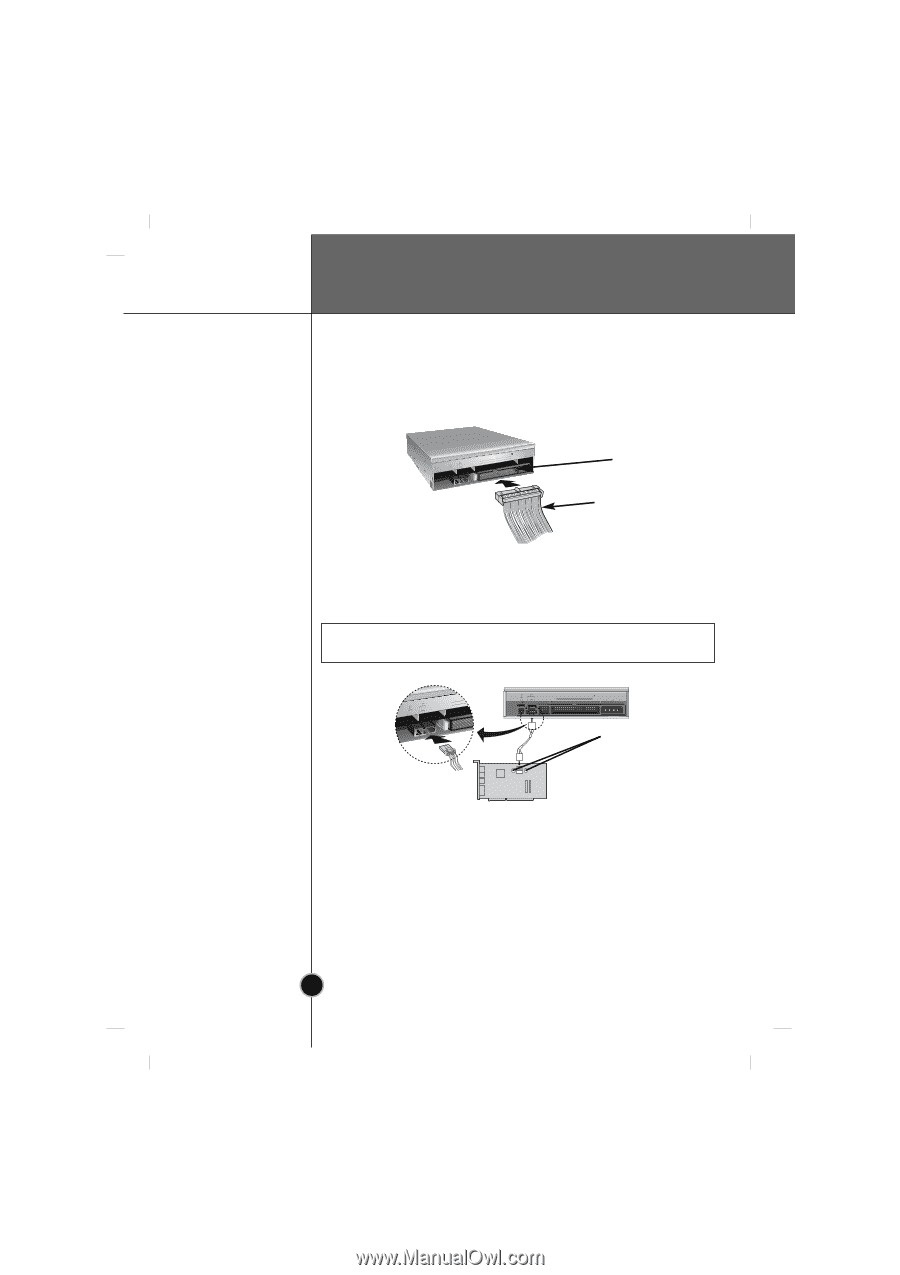
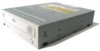
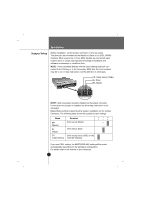
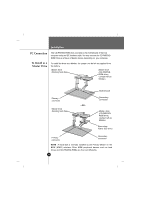
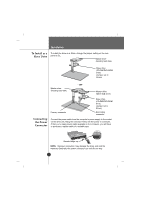
DirectCDTM v2.5b(s) Installation Connecting the Interface Connector Connect the 40-pin IDE cable to the back of the CD-RW/DVD-ROM Drive, making sure the coloured (red) stripe on the IDE cable is connected to pin 1 on the CD-RW/DVD-ROM drive. Pin 1 is closest to the Power Connector. NOTE : Generally, the IDE connector is keyed and will only fit one way. DIGITAL AUDIO R ANALOG AUDIO G L C S S L M A 39 40 D G INTERFACE POWER 1 +5 GND +12 2 Pin1 Red-edge Connecting the Sound Card If the computer is using a sound card, the drive is connected to the sound card with an audio cable. The supplied analog audio cable fits most sound cards or one can be purchased at a local computer store. Refer to the manual for the sound card for detailed information regarding connection. DIGITAL AUDIO R ANALOG AUDIO G L C S S L M A 39 40 D G INTER DIGITAL ANALOG AUDIO AUDIO D G R G L C S M S LA 39 40 INTERFACE POWER 1 +5 GND +12 2 marking L-R L R Replacing the Computer Cover Sound card When the installation of the drive unit is complete, replace the computer cover 10
-
 1
1 -
2
-
3
-
4
-
5
-
6
-
7
-
 8
8 -
 9
9 -
 10
10 -
 11
11 -
 12
12 -
 13
13 -
 14
14 -
 15
15 -
 16
16 -
 17
17 -
 18
18 -
19
 |
 |