LG HBLG6000R Service Manual - Page 14
Installation Kit Some models
 |
View all LG HBLG6000R manuals
Add to My Manuals
Save this manual to your list of manuals |
Page 14 highlights
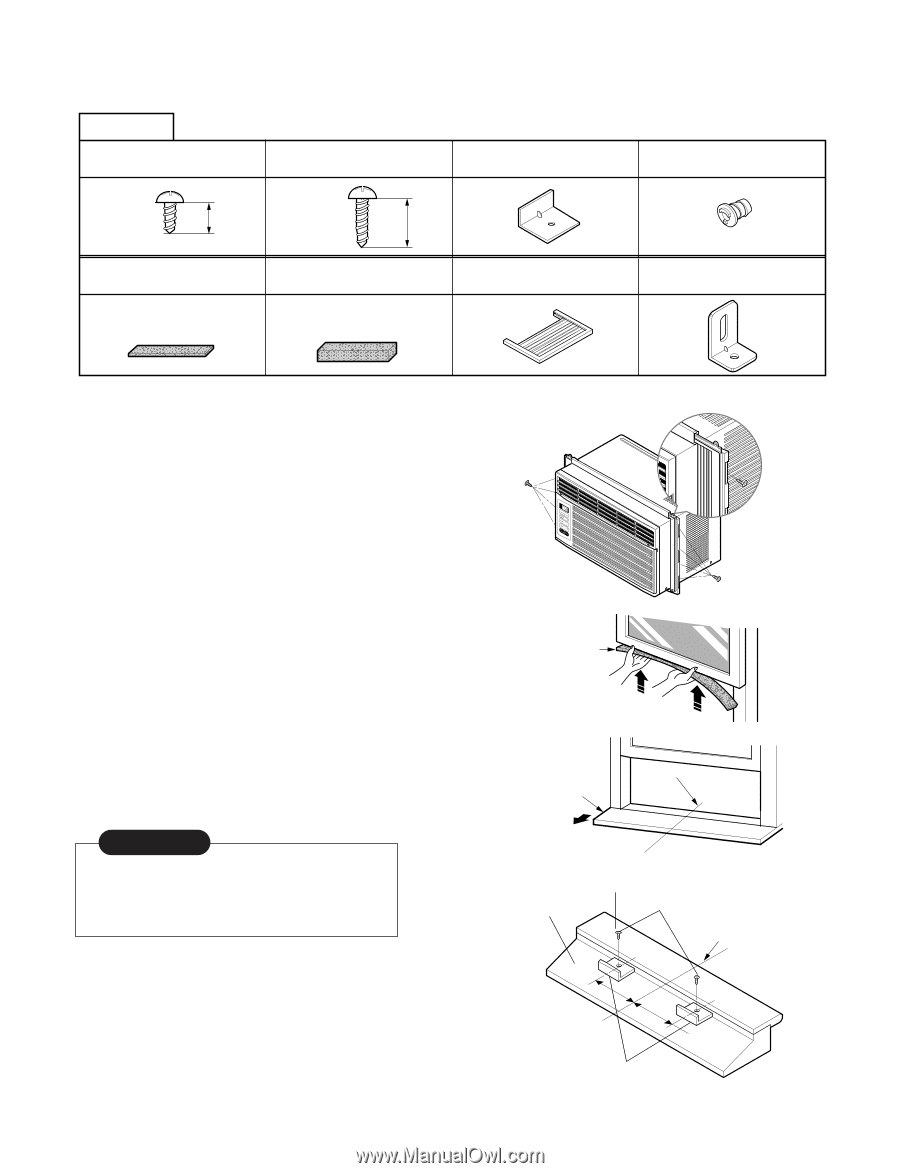
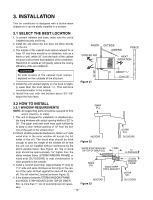
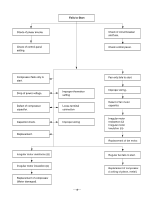
Installation Kit (Some models) HARDWARE TYPE A: 11EA (SHORT SCREW) TYPE B: 5EA (WOOD SCREW) TYPE C: 3EA (L BACKET) DRAIN PIPE 10mm 16mm TYPE D: 1EA (SEAL STRIP) (Adhesive backed) TYPE E: 1EA (SASH SEAL) (Not adhesive backed) TYPE F: 2EA (GUIDE PANEL) TYPE G: 1EA (SUPPORT BACKET) 3.2.2 BEFORE INSTALLATION 1. Insert the guide panels into the guides of the air conditioner. Fasten the curtains to the unit with screws (TYPE A), as shown Figure. 24. 2. Cut the adhesive-backed seal strip (TYPE D) to the window width. Remove the backing from the seal strip and attach the seal strip to the underside of the bottom window. (Figure. 25) 3.2.3 NOW START INSTALLATION 1. LOCATING UNIT IN WINDOW Open the window and mark center line on the center of the inner sill, as shown in Figure. 26. 2. ATTACH L BRACKET a. Install the L brackets behind the inner window sill, with the short side of bracket as shown. Use the 2 screws (TYPE A) provided. b. The bracket helps to hold unit securely in place. Be sure to place bracket edge flush against back of inner sill. See Figure. 27. CAUTION During the following step, hold unit firmly until window sash is lowered to top channel behind side panel frames. Personal injury or property damage may result if unit falls from window. 3. INSTALL THE AIR CONDITIONER IN THE WINDOW a. Carefully lift the air conditioner and slide it into the open window. Make sure the bottom guide of the air conditioner drops into the notches of the L bracket. See Figure. 27. TYPE A Figure 24 SEAL STRIP (TYPE D) Figure 25 TYPE C INNER SILL CENTER LINE ROOM SIDE Figure 26 INNER SILL OUTER SILL TYPE A INSIDE CENTER LINE 8" 8" OUTSIDE Figure 27 L BRACKET -14-
-
 1
1 -
2
-
3
-
4
-
5
-
6
-
7
-
8
-
 9
9 -
 10
10 -
 11
11 -
 12
12 -
 13
13 -
 14
14 -
 15
15 -
 16
16 -
 17
17 -
 18
18 -
 19
19 -
20
-
21
-
22
-
23
-
24
-
25
-
26
-
27
-
28
-
29
-
30
-
31
-
32
-
33
-
34
 |
 |