LG L4200A User Guide - Page 22
How to adjust the OSD On Screen Display screen, How to adjust the screen automatically
 |
View all LG L4200A manuals
Add to My Manuals
Save this manual to your list of manuals |
Page 22 highlights
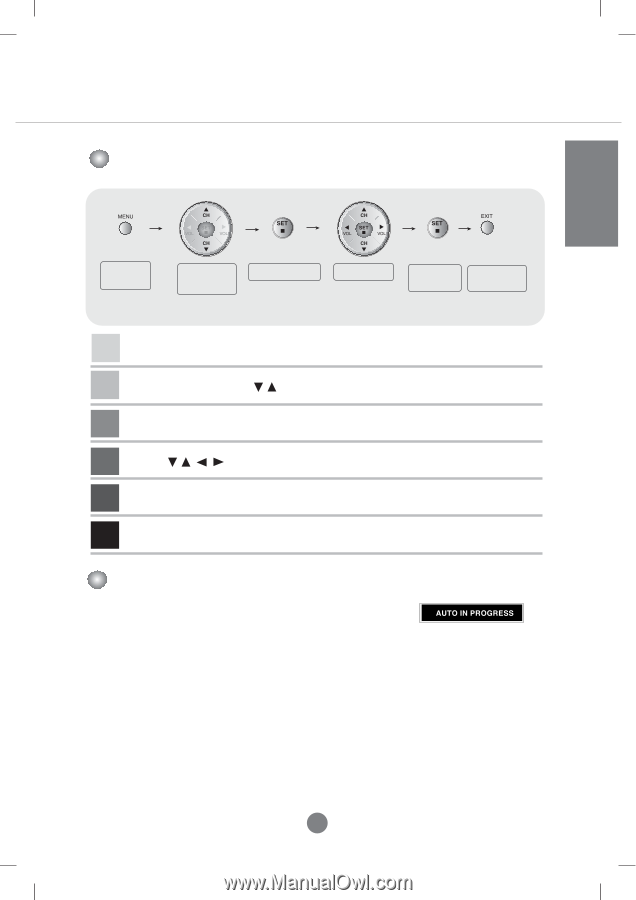
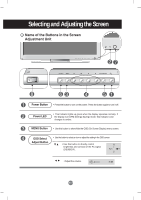
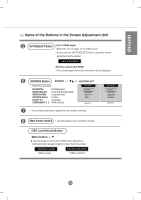
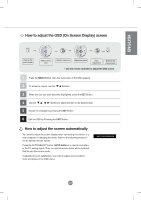
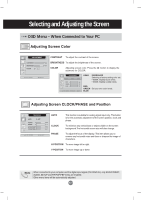
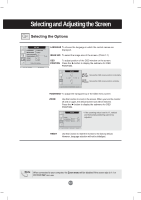
ENGLISH How to adjust the OSD (On Screen Display) screen Pops up the menu screen Select a menu icon Select a menu icon Adjust the status Save adjustment Exit from the menu screen. • Use the remote controller to adjust the OSD screen. 1 Press the MENU Button, then the main menu of the OSD appears. 2 To access a control, use the Buttons. 3 When the icon you want becomes highlighted, press the SET Button. 4 Use the Buttons to adjust the item to the desired level. 5 Accept the changes by pressing the SET Button. 6 Exit the OSD by Pressing the EXIT Button. How to adjust the screen automatically You need to adjust the screen display when connecting the monitor to a new computer or changing the mode. Refer to the following section to set an optimal monitor screen. Press the AUTO/SELECT button (AUTO button in a remote controller) in the PC analog signal. Then, an optimal screen status will be selected that fits into the current mode. If adjustment is not satisfactory, you need to adjust screen position, clock and phase in the OSD menu. A20
-
 1
1 -
2
-
3
-
4
-
5
-
6
-
7
-
8
-
9
-
10
-
11
-
12
-
13
-
14
-
15
-
16
-
 17
17 -
 18
18 -
 19
19 -
 20
20 -
 21
21 -
 22
22 -
 23
23 -
 24
24 -
 25
25 -
 26
26 -
 27
27 -
28
-
29
-
30
-
31
-
32
-
33
-
34
-
35
-
36
-
37
-
38
-
39
-
40
-
41
-
42
-
43
-
44
 |
 |