LG LP0723WSR Owners Manual - Page 12
Attaching the Flexible Vent Hose Set, Selection of Installation Location
 |
View all LG LP0723WSR manuals
Add to My Manuals
Save this manual to your list of manuals |
Page 12 highlights
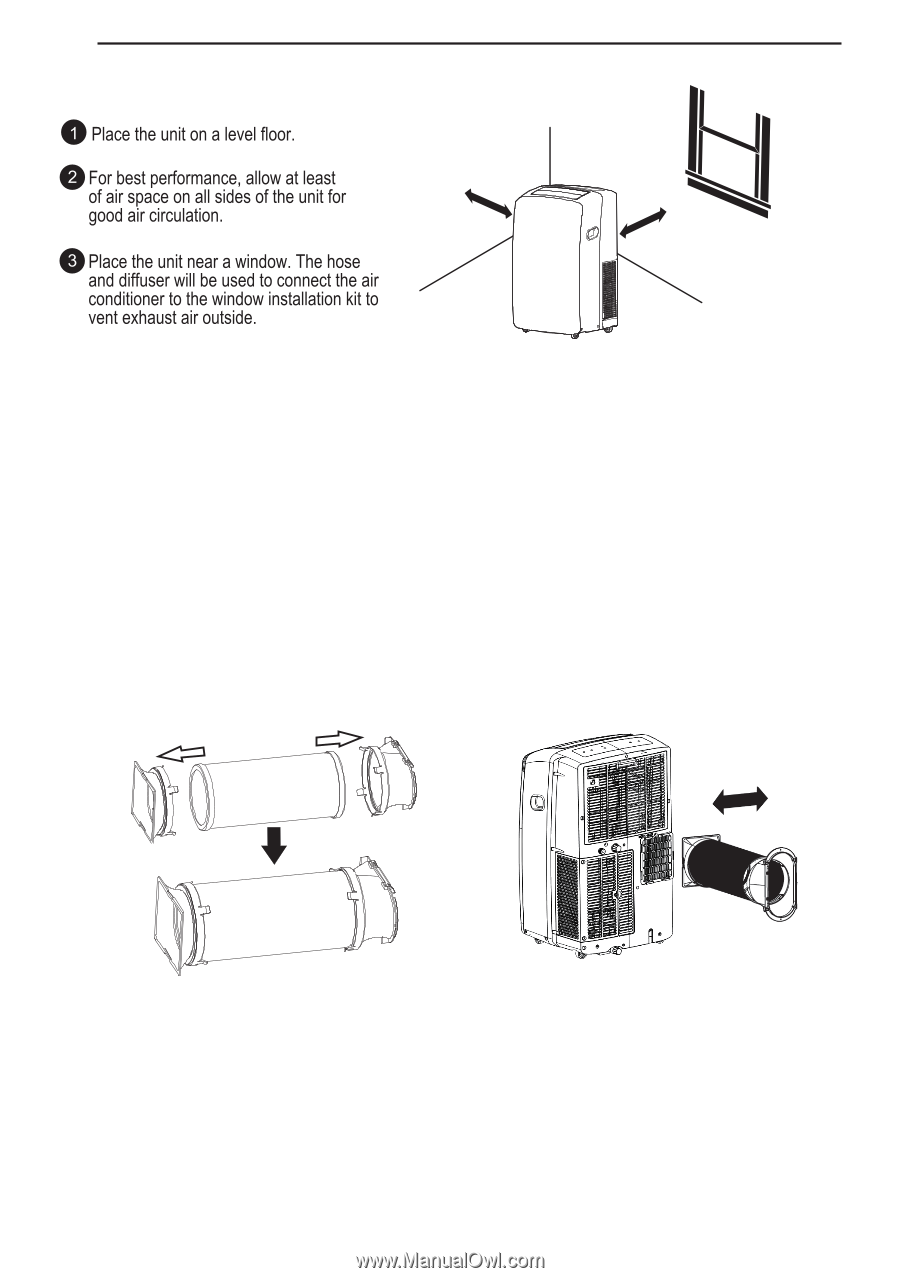
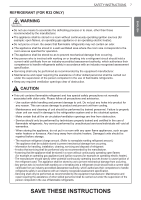
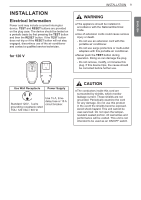
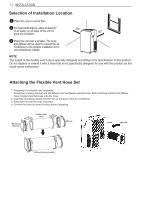
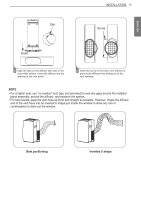
12 INSTALLATION Selection of Installation Location 20″ 20″ 20″ NOTE The length of the flexible vent hose is specially designed according to the specification of this product. Do not replace or extend it with a hose that is not specifically designed for use with this product as this could cause malfunction. Attaching the Flexible Vent Hose Set 1. Preparing the exhaust hose assembly: Press the mounting bracket and the diffuser into the flexible exhaust hose. Both mounting bracket and diffuser have integral clips that snap onto the hose. 2. Insert the mounting bracket into the slot on the back of the air conditioner. 3. Slide down to lock the hose into place. 4. Confirm the hose is locked in place before operating. Mounting Bracket Flexible Vent Hose Diffuser LOCK UNLOCK Exhaust hose assembly
-
 1
1 -
2
-
3
-
4
-
5
-
6
-
 7
7 -
 8
8 -
 9
9 -
 10
10 -
 11
11 -
 12
12 -
 13
13 -
 14
14 -
 15
15 -
 16
16 -
 17
17 -
18
-
19
-
20
-
21
-
22
-
23
-
24
-
25
-
26
-
27
-
28
-
29
 |
 |