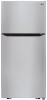
LG LTCS20020S Owners Manual - Page 23
Drill A Hole For The Valve, Tighten The Valve, Tighten The Trap, Place The Pipeline, Connect
 |
View all LG LTCS20020S manuals
Add to My Manuals
Save this manual to your list of manuals |
Page 23 highlights
CONNECTING THE WATER LINE 3. DRILL A HOLE FOR THE VALVE Drill a 1/4" (6,35 mm) diameter hole in the water pipeline. Remove jagged edges produces after perforation. Make sure water does not reach the drill. Not performing the 1/4" (6,35 mm) perforation can lead to a low or smaller ice production. 4. TIGHTEN THE VALVE Tight the valve into the cold water pipeline with a tube trap. Pipe Clamp Saddle Type Shutoff Valve Compression Nut Packing Nut Outlet Valve Ferule (sleeve) 8. DRAIN THE PIPE Open the main water source (1) and drain the pipe until water comes out clear. Saddle Type Vertical Cold 1 Shutoff Valve Water Pipe NOTE: Codes for 248 CMR pipelines of the state of Massachusetts must be attached to the connection. Valves of this type are banned in Massachusetts. Call an authorized plumber by the norms and regulations of your country. Allow water flow from the bypass valve (2) and close after draining 1/4 of a gallon (1L) of water. 5. TIGHTEN THE TRAP Tighten the trap until the sealing ring begins to grow. NOTE: Make sure it is not too tight, this can break the 2 pipe. Washer Pipe Clamp Inlet End Clamp Screw 6. PLACE THE PIPELINE Place the pipeline between the cold water pipe and the refrigerator. Place it through a hole in the wall or floor (behind the refrigerator or next to the cabinet) as close to the wall as possible. NOTE: Make sure there is a sufficient amount of extra pipeline (8 feet [244 mm] coiled up three times with a 10" [25 cm] in diameter) to allow free movement of the refrigerator from the wall after installation was made. 7. CONNECT PIPELINE TO VALVE Place the compression nut and the copper pipe ferule at the end of the pipe and connect to the valve. Make sure the pipe is completely inserted into the valve. Tighten nut carefully. 9. CONNECT PIPE TO REFRIGERATOR NOTES: Before making connection to refrigerator, make sure it is not connected to any energy source. If your refrigerator does not have a water filter, it is advised to install one. If your water source contains sand or related particles that can travel to the valve, install a water filter near the refrigerator. IMPORTANT: Never use old or used hoses. Always use new ones to have a better use and experience. Connect always to a potable water source to avoid security and health issues. Remov os (1) f e ce. v ca a 1 21
-
 1
1 -
2
-
3
-
4
-
5
-
6
-
7
-
8
-
9
-
10
-
11
-
12
-
13
-
14
-
15
-
16
-
17
-
 18
18 -
 19
19 -
 20
20 -
 21
21 -
 22
22 -
 23
23 -
 24
24 -
 25
25 -
 26
26 -
 27
27 -
 28
28 -
29
-
30
-
31
-
32
-
33
-
34
-
35
-
36
-
37
-
38
-
39
-
40
-
41
-
42
-
43
-
44
-
45
-
46
-
47
-
48
-
49
-
50
-
51
-
52
-
53
-
54
-
55
-
56
-
57
-
58
-
59
-
60
-
61
-
62
-
63
-
64
-
65
-
66
-
67
-
68
-
69
-
70
-
71
-
72
-
73
-
74
-
75
-
76
-
77
-
78
-
79
-
80
-
81
-
82
-
83
-
84
-
85
-
86
-
87
-
88
-
89
-
90
-
91
-
92
-
93
-
94
-
95
-
96
-
97
-
98
-
99
-
100
-
101
 |
 |
