LG RU-42PX10C Owner's Manual (English) - Page 20
Picture Menu Options continued
 |
View all LG RU-42PX10C manuals
Add to My Manuals
Save this manual to your list of manuals |
Page 20 highlights
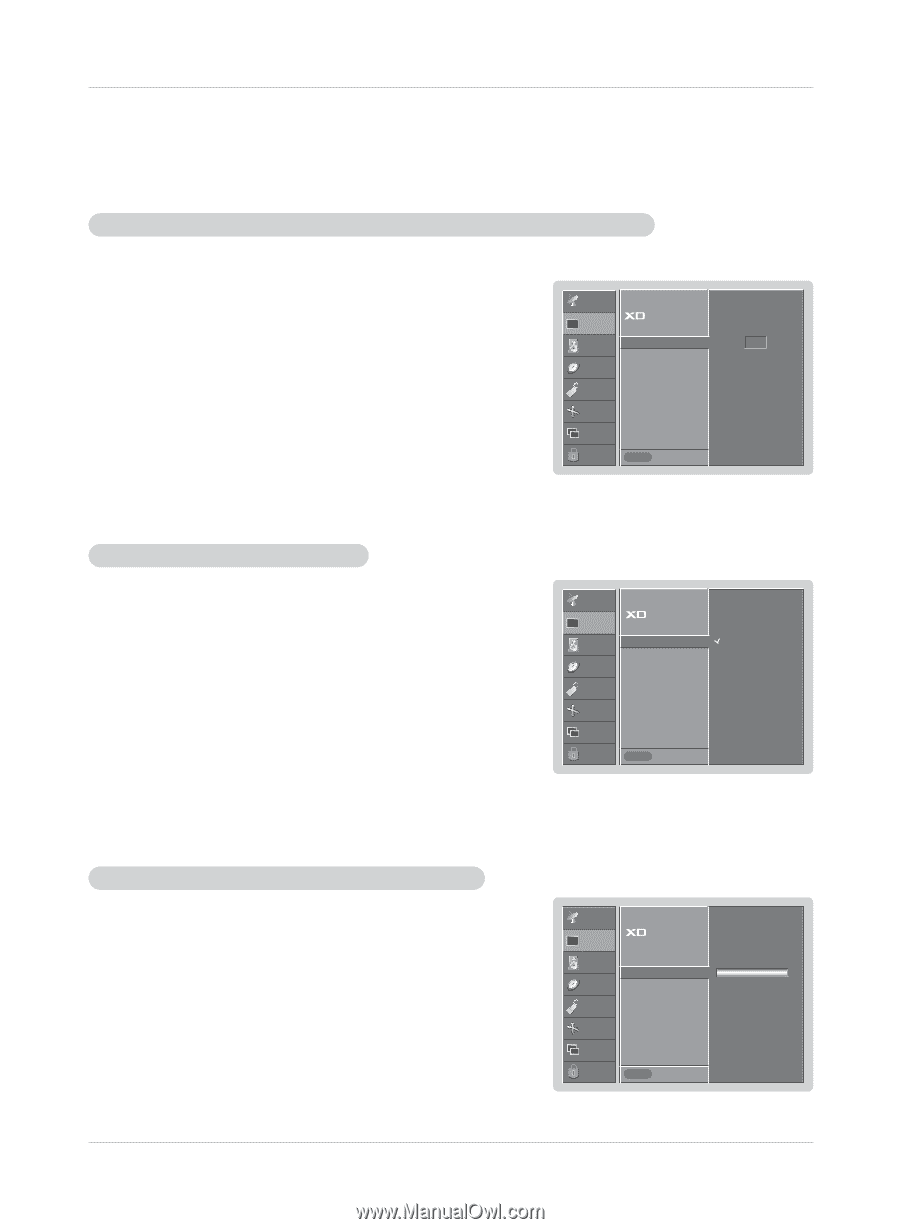
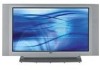
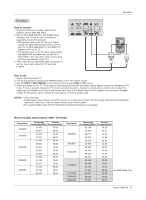
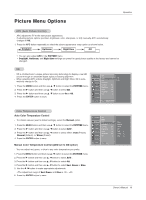
Operation Picture Menu Options continued Fleshtone (TV, Video1-2, Component 1-2, RGB-DTV, and DVI-DTV Mode only) - Use Fleshtone to select the desired skin color option. 1. Press the MENU button and then use D / E button to select the PICTURE menu. CHANNEL APC 2. Press the G button and then use D / E button to select Fleshtone. PICTURE ACC 3. Press the G button and then use F / G button to make appropriate adjustments. SOUND Fleshtone G 0 • The adjustment range is 0 ~ 3. TIMER Contrast 100 Brightness 55 4. Press the ENTER button to save. SPECIAL Color 55 Sharpness 60 SCREEN Tint 0 PIP/DW LOCK Menu Prev. sRGB (only RGB-PC, DVI-PC Modes) - If the TV is connected to external equipment using sRGB, set sRGB to On to adjust for the color difference. 1. Press the MENU button and then use D / E button to select the PICTURE menu. 2. Press the G button and then use D / E button to select sRGB. 3. Press the G button and then use D / E button to select On or Off. 4. Press the ENTER button to save. CHANNEL APC PICTURE ACC SOUND sRGB G On Contrast 100 Off TIMER Brightness 55 SPECIAL Color 55 SCREEN PIP/DW LOCK Menu Prev. Manual Picture Control (APC set to set to Off option) - You can adjust picture contrast, brightness, color, sharpness, and tint options to the levels you prefer. 1. Press the MENU button and then use D / E button to select the PICTURE menu. 2. Press the G button and then use D / E button to select the desired picture option (Contrast, Brightness, Color, Sharpness, Tint). 3. Press the G button and then use F / G button to make appropriate adjustments. 4. Press the ENTER button to save. CHANNEL APC PICTURE SOUND TIMER SPECIAL SCREEN ACC Fleshtone Contrast Brightness Color Sharpness Tint 100 G 60 50 50 0 PIP/DW LOCK Menu Prev. 20 Plasma TV
-
 1
1 -
2
-
3
-
4
-
5
-
6
-
7
-
8
-
9
-
10
-
11
-
12
-
13
-
14
-
 15
15 -
 16
16 -
 17
17 -
 18
18 -
 19
19 -
 20
20 -
 21
21 -
 22
22 -
 23
23 -
 24
24 -
 25
25 -
26
-
27
-
28
-
29
-
30
-
31
-
32
-
33
-
34
-
35
-
36
-
37
-
38
-
39
-
40
-
41
-
42
-
43
-
44
 |
 |